
TWiP episode 384: Behind the Seen
In this episode of TWiP, I co-host with Matt Granger and Frederick Van Johnson to talk about ways to work with models, stay inspired, & what goes into planning a creative shoot.
Check it out at http://thisweekinphoto.com/twip-384-behind-seen/
Fill Your Creative Pantry
Visit a Museum
Be a Couch Potato
Surf the Web
Take a Hike
Look at the Pictures
Let It Simmer
This Week In Photography Episode 380
I was co-host this week on the TWiP (This Week in Photography) podcast.
In this episode of TWiP Frederick Johnson, Evgeny Tchebotarev & I talk about the U.S. Forest Service and their requirement to have a $1500 permit to photograph on federal wild lands. Plus Adobe announces Photoshop Elements & Premiere Elements 13.
Check it out
http://thisweekinphoto.com/twip-380-elements-photography/
Improve Your Travel Photography With Self Assignments
I have been travelling a lot this past month and while I tend towards photographing people in the studio I also take my camera with me whenever I travel. I use these trip as a way to expand my photography horizons., whether it is improving my landscape photography skills, practicing street photography or just documenting my trip by taking my own "postcard" shots. I view every trip as a learning opportunity.
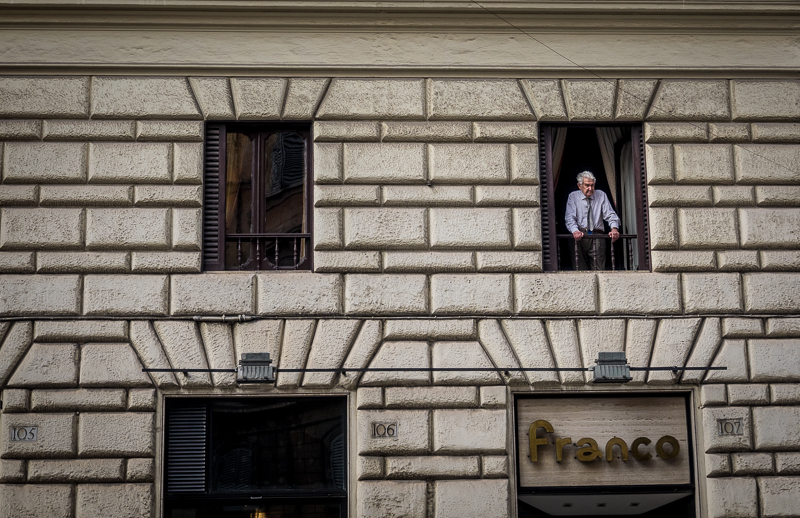
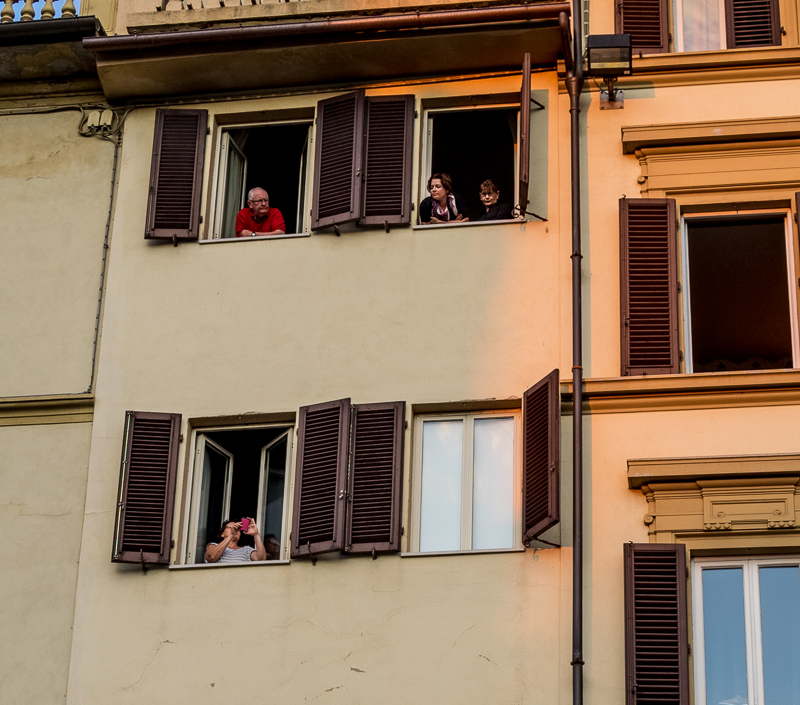
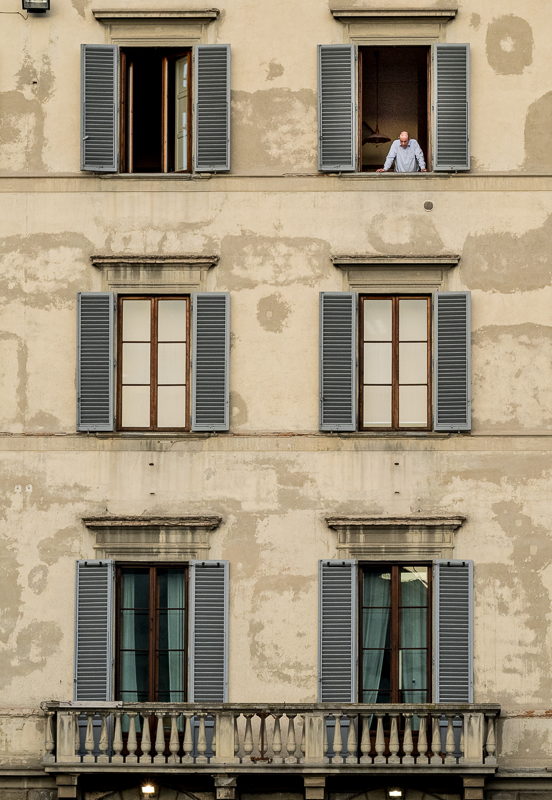
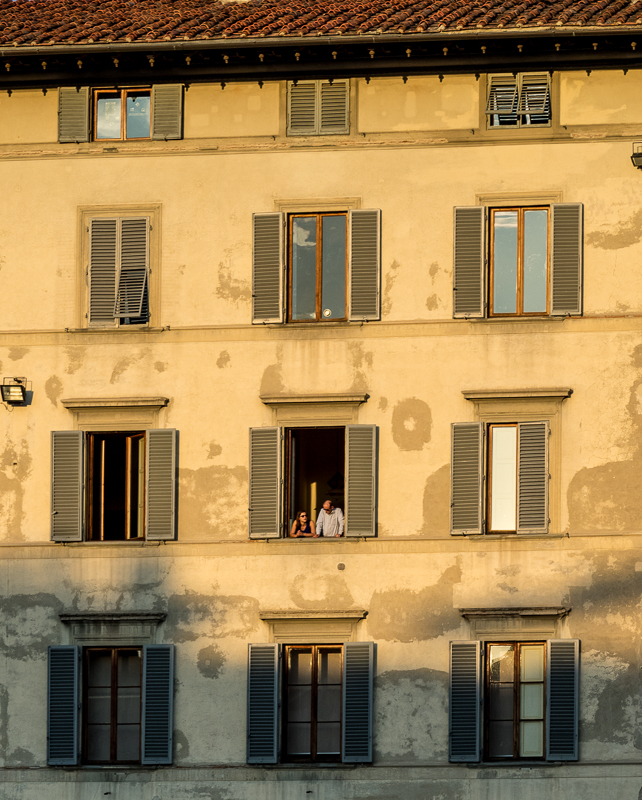
People in Windows
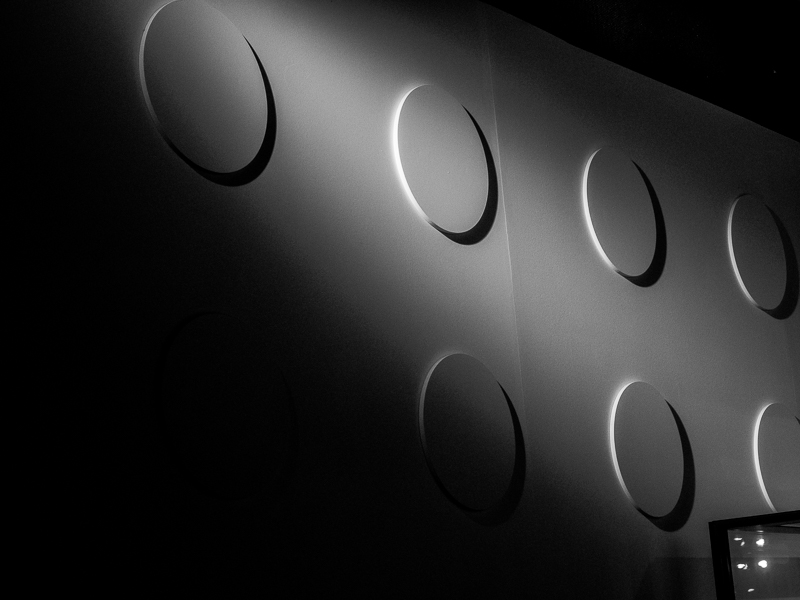
Patterns and Shadows


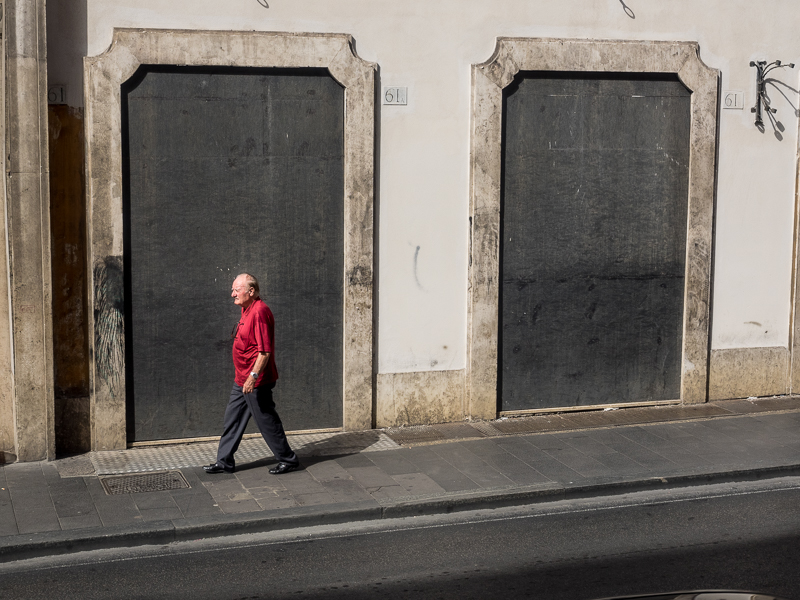
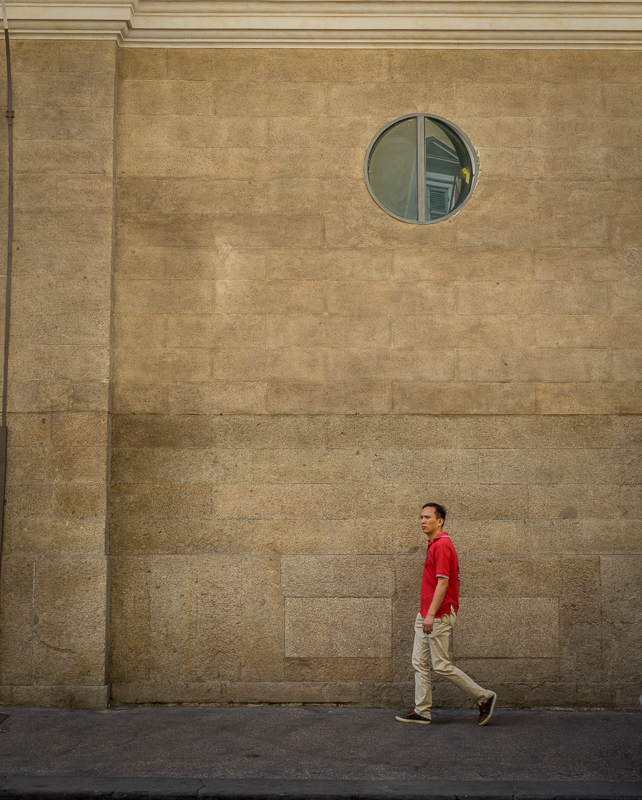
People Walking in Front of Interesting an Background


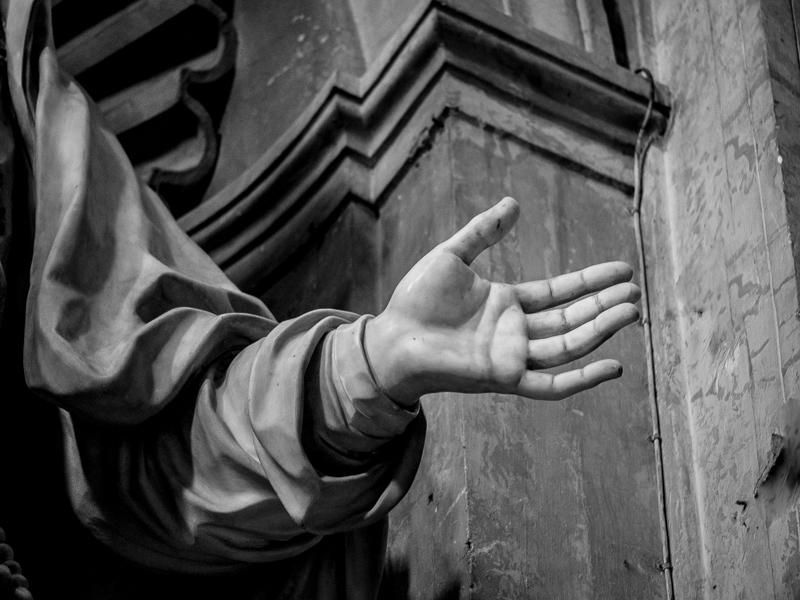
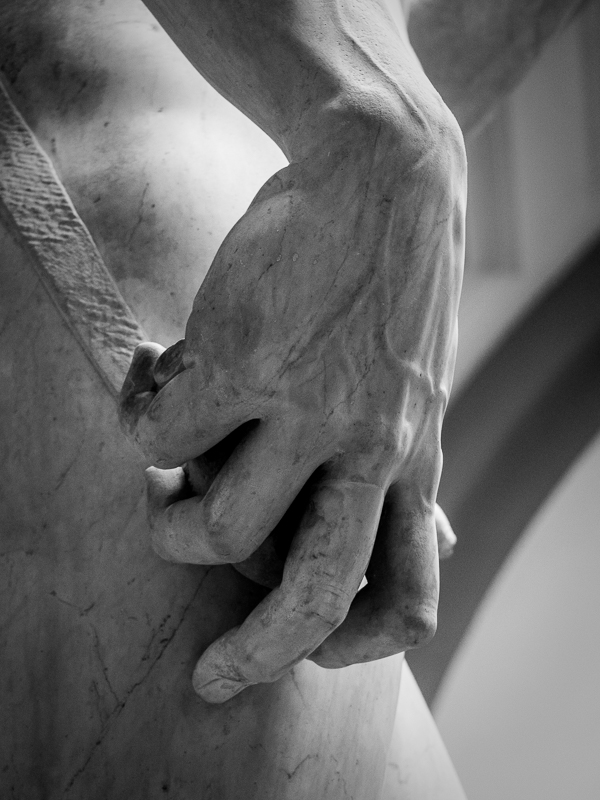
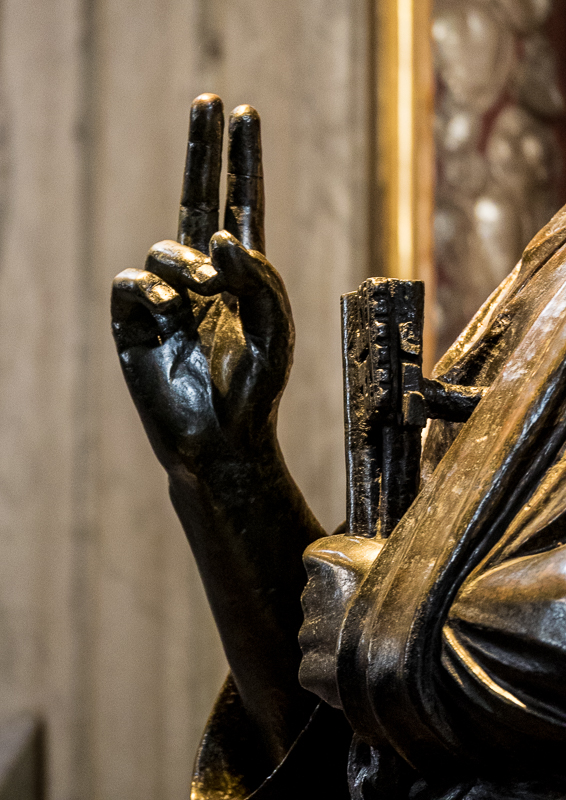
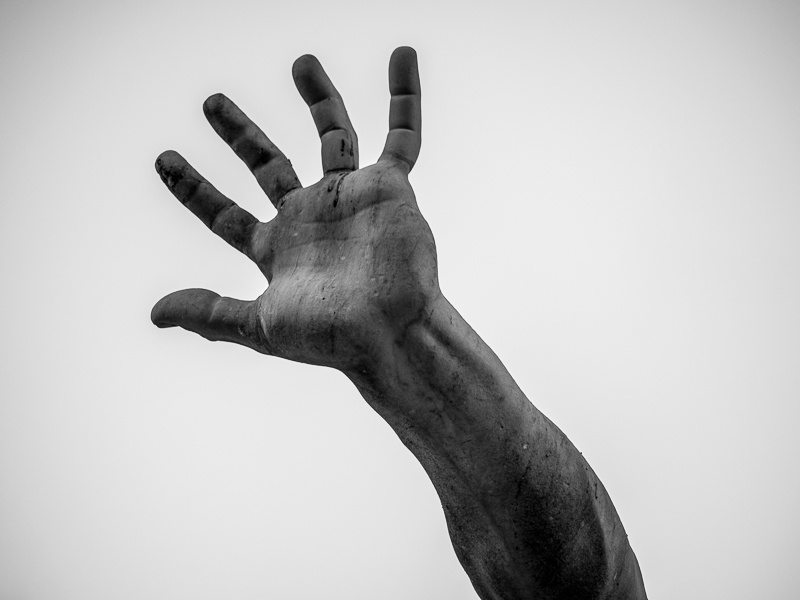
Close-ups of Statues
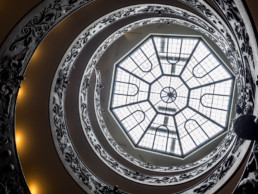
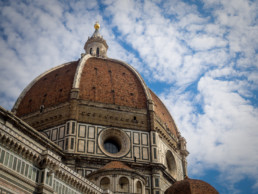
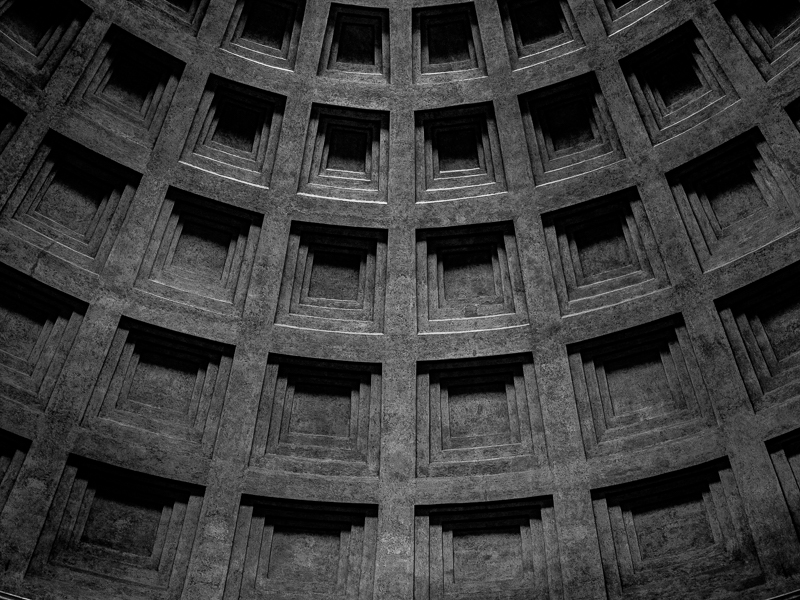
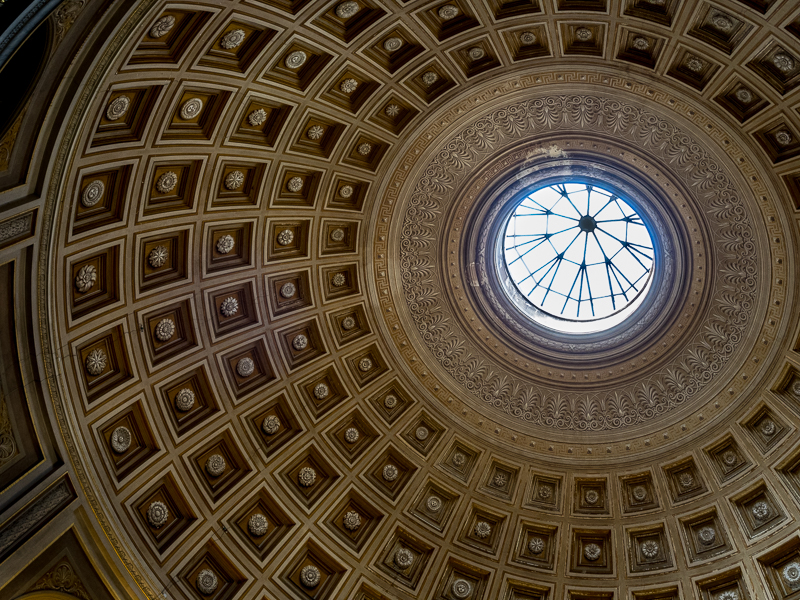
Domes and Ceilings


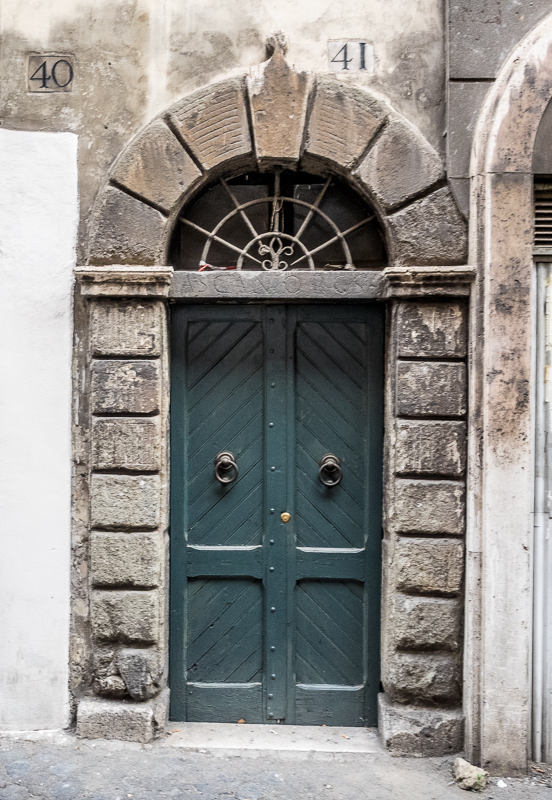
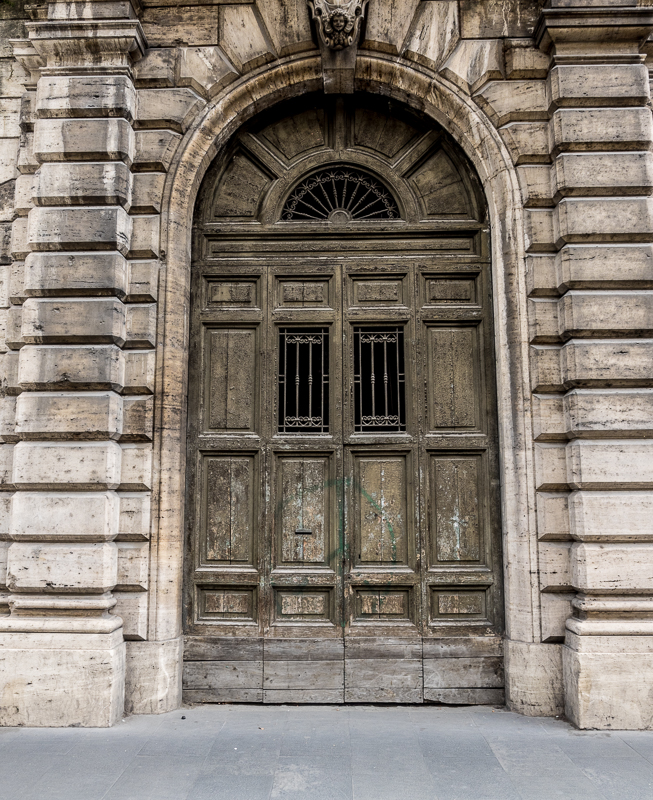
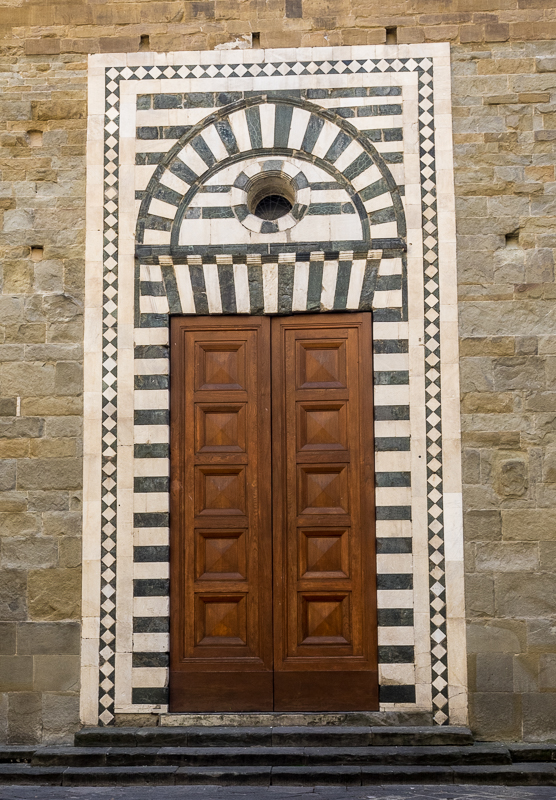
Doors

Conclusion
Gaining Experience
So What Does It Mean?
Procrastination and Fear
Life is just a series of experiences strung together
Take a Photo Trip!
Want a sure fire way to take better landscape photographs? Plan a photo trip. Every photo trip I have ever done has resulted in some of my top photos of the year.
Why a Photo Trip?
The reason I get such great photos on photo trips is focus, and I don't mean camera focus, mental focus. Because I am there to take photographs and nothing else I immerse myself into the task. I get up before sunrise and finish up after sunset; I take my time at the location trying different compositions and angles; I experiment with long exposures, panoramas, and HDR. I plan!
Planning
This is probably one of the more important aspects of a photo trip. Before the trip I will map out my destinations, look at tide tables, and sunrise/sunset times. But even when my plans go awry I still get good shots, because I have time, I have a purpose, and I have a single task. Take photos.
Dedicated Time
This is why photo trips are so successful. You have time to take photos, you aren't rushed. When I am travelling with my family they are somewhat tolerate of me taking photos, but they expect me to get a shot in a few minutes whether the lighting is right, or the tide is wrong. When I am by myself or with other photographers there is no problem setting up and spending an hour at a location waiting for just the right conditions and getting the best shot I possibly can.
It Doesn't Have to Be Far
A photo trip doesn't mean that you have to pack your bags and book a flight. It can be somewhere local, somewhere you can drive to in a day. It's not the destination that is important it is dedicating the day to photography that is going to allow you to take better photos.
Look for Opportunities
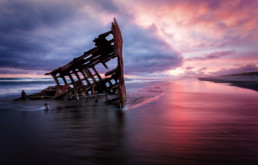
Do you need to travel for work? Perhaps add a day or two onto the end of the trip and go photograph the local sights. I recently did this on a trip to Portland. I was there with friends the beginning part of the week, after dropping them off at the airport I headed West and spent several days photographing the Oregon coast (where I took the photo of the Wreck Peter Iresdale at the top of this post).
I did the same thing when I went to the Palm Springs Photo Festival in April, after the festival I spent a day at Joshua Tree and then an additional day at the Salton Sea finishing off a project there. Airfare was already paid, the car rental actually went down because I was renting for a full week. I just needed a couple of cheap hotels for the extra night.
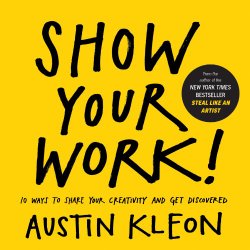
Book Review: Show Your Work
This is the second book by Austin Kleon, I reviewed his first book "Steal Like an Artist" back in April 2012. This new book Show Your Work!: 10 Ways to Share Your Creativity and Get Discovered is tips and suggestions about how to share your work online.
Finding an Audience
As frequent readers of my blog know I write a lot about finding an audience for your work. In this day and age when there are so many artists sharing their work on the internet it can be difficult to get seen and find those people who will truly connect with your work. This gives a lot of tips on how to find this audience and while a lot of them are common sense, listen to your audience, don't hoard your work, don't spam, it never hurts to be reminded.
Motivation
More important than giving me tips on how to find my audience, this book provided me with motivation. It makes we want to get out there and share my work more, connect with fellow creatives, and just get out. This is exactly the sort of thing that also makes me more creative and want to create more. It's a self-perpuating cycle that happens to be going the direction I want to go.
This is an easy read and well worth the time. Pick up a copy and then let me know how you liked it.

Stop Reading This Blog Post!
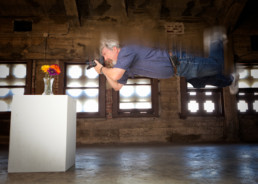
I'm serious. Stop reading this blog post and instead go out and create! Take an epic photograph! Pick up your camera and take a photo!
It has been a while since I completed my last photo shoots which were shooting a model at Joshua Tree and then a day at the Salton Sea taking photos for my A Place to Sit project. Instead of going out shooting, or planning shoots, I have instead been reading about photography, watching YouTube videos about photography, updating my photography web sites, and a hundred of other things that are about photography but are keeping me from doing what I love most, CREATING PHOTOGRAPHS!
The Illusion of Photography
It is very easy to get caught up in reading about photography, looking at others photos, sitting on the toilet watching CreativeLive videos on my iPad, and feel like I'm still a photographer, but that is an illusion. There is the illusion that I am making progress when I am being creative and coming up with shoot ideas, however without execution it is pointless. I'm procrastinating.
There are a lot of reasons why procrastination occurs. But for me is comes down to laziness and fear. Perhaps laziness is too strong a word, it is rather I take the path of least resistance.
Path of Least Resistance
It is much easier to sit at my computer and dream about photography than it is to actually do the planning necessary to do for the shot. A lot of my concepts involve building/aquiring props, recruiting a model, scouting a location, finding time on calendar to actually schedule the shoot. It's often daunting for some of the larger shoots. It is so much easier to just sit and think about the project. My solution is to stop thinking about photography and go shoot a damn photo!
So Are You Still Reading? STOP!
Pick up you camera right now and go take a photo. Execute! Photograph! Then once you are done come back and share a link to what you shot!
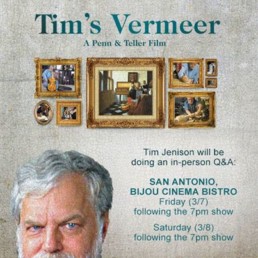
Review - Tim's Vermeer
Tim's Vermeer is a documentary about Tim Jenison's attempt to recreate a painting by Dutch painter Johannes Vermeer. Tim's believed that Johannes used mechanical aids similar to a camera obscura to help him create his works of art. The movie follows Tim's quest to construct such a device and then recreate Vermeer's painting "The Music Lesson".
Although not a photography related movie, it is well worthwhile and I encourage everybody artists and not artists alike to watch this movie.
Highly recommended.
Tutorial - Sparks Photos
Whenever I post one of my Sparks photos I get bombarded with requests on how I achieved the effect. It is a relatively easy effect to but does take some planning and caution. In this post I'll go through all the steps I use in creating these sparks photos.
Disclaimer: This technique is very dangerous and I DO NOT recommend you attempting this yourself.
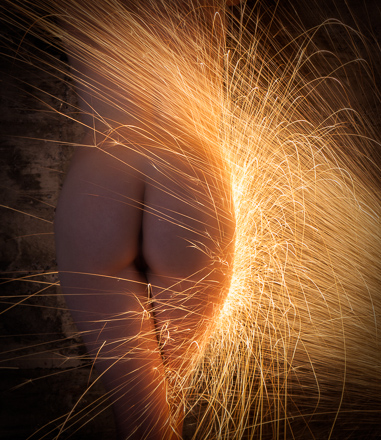
Concept
The idea behind the sparks photos are to bounce a shower of sparks off of the models body. This is accomplished by doing a long exposure shot and generating the sparks using an angle grinder.
What you will need
- Tripod
- Intervalometer or an assistant.
- Angle Grinder
- Cold Roll Steel bar stock(IMPORTANT – It must be cold roll steel, most other metals generate hot sparks that will burn your model).
- Safety Glasses
- Fire Extinguisher
– 10lb AB or ABC
Safety
There are lots of ways to hurt yourself and your model when doing sparks photos and again I recommend you DO NOT attempt this. The dangers are fire, flying projectiles, burns, and getting particles in your eyes. If you are dead set in trying this technique be sure to follow some common-sense safety practices.
Fire
Area - Do not attempt this in an area where there is combustible material. All my shots are done in a concrete room with concrete walls and floors. This could also be done outdoors at the beach, but I would not attempt it around trees, or dried grass. Also have a fire extinguisher with you and within reach! Don’t use one of those small wimpy fire extinguishers, get a decent sized one, I recommend a minimum of a 10lb AB or ABC extinguisher.
Clothing - I only use nude models for these shots so there is no danger of any clothing catching on fire, do not use this technique on clothed models.
Hair - Hair also burns so be sure the models hair is up in a bun and away from the sparks. There should be no gels or other hair styling product in the model's hair as many of these products are flammable.
Flying Projectiles
The angle grinder is spinning very fast and can propel chunks of metal at high velocities towards your model. It is fast enough to penetrate the skin which is not a good thing. You want to make sure that no pieces of your cold-roll steel are going to break loose and be thrown at your model. You also need to have a large enough piece of cold-roll steel that you can safely grip it. I recommend flat bar stock at least 1.5” wide and 14” long. As you grind the metal it is going to get thin in places and can possibly break loose, so before each series of shots break these pieces off by hand (or grind them off)
Eye Protection
The sparks the grinder is throwing off are red hot particles of metal which can do serious damage if they were to get in your eyes. Everyone in the room should wear eye protection! If the model’s face is visible in the shot then they should close their eyes whenever the grinder is running. If you want a shot where the models eyes appear open, take a shot without the sparks with their eyes open and then have them close their eyes and shower them with sparks. You can then merge the two images in Photoshop to make it appear that their eyes were open in the shot. Never throw sparks at the model while their eyes are open!
Burns
The sparks are particles of burning metal and can burn the skin. There are several ways to minimize this, one is to make sure you use cold-roll steel. The sparks that are thrown off are much cooler than other metals such as hot-roll or stainless steel. The sparks cool off as they travel away from the grinder, so they will be hottest close to the grinder and cooler the further away you get from the grinder, so stand back away from the model. I am typically 5-6 feet away from the model when showering them with sparks.
Alright, now that we got all that out of the way let’s move on to the setup.
Setup
Setting up your camera.
Use a tripod - Because these shots use long exposure your camera needs to be on a tripod. The type of tripod is not important as long it holds your camera steady.
Turn off Image Stabilization - If the lenses or camera you are using has image stabilization, turn if off.
Turn off Auto Focus - Because you are shooting long exposure you will want the room to be fairly dark. As a result of this the camera will probably have trouble auto-focusing, so I recommend setting your camera to manual focus. Compose your shot, focus on the model and you should be all set.
Interval Timer (Intervalometer) – If you are shooting with an assistant then an interval timer is optional. But if you are shooting alone is essential, since you cannot be using the angle grinder and pushing the shutter button at the same time. Here are the settings I use on my interval timer:
Initial delay: 10 seconds
Interval between shots: 1 seconds
Exposure length: 3 seconds
Number of Exposures: 6
The initial delay gives me enough time to start the Intervalometer and get in to position with the angle grinder before the first shot. I then start the grinder and will shower the model with sparks for 24 seconds (3 seconds exposure + 1 second interval) * 6 exposures. Some models can’t tolerate the sparks for that long, so I will stop when they tell me and let the camera take shots until the interval is complete and then delete the shots with no sparks.
Lighting
I use 3 types of lighting for my sparks photos and each give a slightly different look. I recommend you try all three methods to determine which look you like best.
No lighting – I make the room completely dark and just rely on the sparks to generate the light in my photograph. This often requires longer exposure times, or higher ISO which may not be desirable. The longer exposure times will often cause the model to be blurry because of slight movements. High ISO can result in noise in the image which may or may not add to the image. Give it a try.
Modeling Light – I setup one of my strobes with a large softbox and turn on the modeling light and use the light from that modeling light as my only source of illumination. Because of the long exposures the modeling light will result in a pretty good fill light and will give a little more definition to the model’s body.
Strobe – Using a strobe will freeze the model in the image and can minimize any blur caused by movement of the model during the long exposure. I will match the power of the strobe to the aperture setting I am using on the camera, typically either f/5.6 or f/8.
Camera Settings
I always start off with the following camera settings
Shutter Speed: 2 sec
Aperture: f/8
ISO: 100 if using modeling light or stobe, 800 if using no lighting.
I will then take a few shots and adjust my settings as necessary. If there are too many sparks or the majority of the sparks are over-exposed I will lower the shutter speed to 1 sec. The faster the shutter speed the fewer the sparks, and visa-versa.
Taking the Shot
Posing Considerations
There are several things to consider with posing.
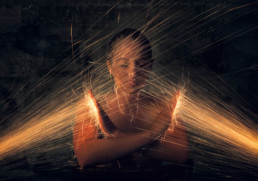
Because these photos are done with a long exposure you need to make sure the model can hold the pose for the duration of the shot. They need to be balanced and it helps if they arms are somehow supported. For the image where the sparks are bouncing off the models hands, she rested her forearms on the back of a chair so they would not move during the shot. For the photo below of the model appearing to drink the sparks, her elbows are resting on the back of a chair so that her hands don't move during the long exposure.
The most interested poses are ones where there is a contour to the body that the sparks much follow. Something that is going to block some portion of the sparks, or a nice curve to the body that the sparks can outline.

Grinder technique
Using the grinder to throw the sparks takes practice. You want to have a continous stream of sparks coming off of the grinder. This is not always easy because you are also sweeping the grinder back and forth to spray the sparks along the model's body. This sweeping movement tends to make the metal not maintain good contact with the grinder.
If your grinder has a shield on it, I often will use the shield as a pivot point for the metal bar. I will rest a portion of the bar on the shield and then lever one end into the grinder. This helps me maintain the stream of sparks.
Once you have a stream of sparks going you want to sweep your arm up and down (or left to right), to direct the sparks against the model. Again this takes practice and it is recommended you practice first without the model.
Multiple Exposures
I will often take multiple exposures and combine them in Photoshop after the shoot. I do this for shots where I want it to appear the model's eyes were open. I first take a shot with no sparks and the model's eyes open, and then will have them close their eyes and take another shot with the sparks. I then combine these two photos using Photoshop.
I also use multiple exposures when I want to have sparks coming from multiple directions (as in the photo at the top of this post). I will first take a shot with the grinder on one side of the model and then I will take another shot from the opposite side then combine the two shots in Photoshop.
Conclusion
As I said in the introduction, this is dangerous and I recommend that you DO NOT attempt it. But if you do, share your photos with me, I would love to see them. :)