
Selecting My Best Work
How do I select my best work? After my last post, A Good Crop - My 2015 Photos, I had multiple people ask me what was my selection criteria for selecting my best images of 2015. My first thought was that they must be saying "How could he pick that piece of crap as his best photo?" But perhaps they really wanted to know. Looking at the images as a group there does not seem to be any common theme between them which makes the selection criteria difficult to grasp.
So I'm going to answer both possible questions and explain my selection process and how I went about determining my best images of 2015.
Selection Criteria
Here are the things I look at when evaluating my photos and trying to determine which are my best.
- Story
- Graphic Elements
- Emotion
- Does it evoke an emotion
- Do I have an emotional attachment to the image
- Audience Response
- Feedback for people who see my images
- Juried exhibits and shows
Story
The strongest photos are always the ones that tell a story. It doesn't have to be an overt story, in fact I try to make the story ambiguous, so the viewer comes to their own conclusion based upon their own life experiences. Many of my best of images this year are on the list because of the story they tell.
Graphic Elements
I think of graphic elements as a combination of composition, and the way the various shapes in the image interact. Abstracts and may of my street images rely on these shapes since there isn't really a story to tell. Strong graphical elements are going to draw the viewer's eye and become the obvious subject of the image.
Emotion
The emotion criteria involves evaluating two types of emotions responses, one good, one not so good.
The Good Emotion
When looking at the photo the question I ask is, "Does the photo evoke an emotional response in the viewer?". A sign of a good photograph is one that gets an emotional response, any response, the type of emotion is unimportant, what IS important is that it makes the viewer feel something.
Emotional Attachment
The other type of emotion that I experience is that I remember the emotions I felt when I took the photo. These emotions are not necessarily good because they cloud my judgement and prevent me from making an impartial decision about the worth of an image. I typically try to avoid any emotional attachment when selecting photos, but sometimes my feelings are so strong for an image I will include it in my selection. I just like it! Often that emotional attachment is partly influenced by the audience response.
Audience Response
Ideally I am taking photographs for myself and not to please others. To truly be art the image has to come from me, and not be influenced by what I think my audience might like. This is a constant struggle, and I try to not think of my audience when I take a photo, but often I know it is going to resonate with my audience the moment I click the shutter. More often I will like an image that my audience does not, or I will show people an image I think is just OK and they love it. I initially considered this audience influence as a negative, but have come to realize it is just another piece of the selection process.
Getting Feedback
I am constantly showing my portfolio to people, friends, family, photographers, models, strangers, pretty much everyone I meet. I always look for what images they respond to, which ones to they comment on, which ones do they stare at a little longer than others, which ones do they flip through quickly. This feedback influences my decision on what are my best images. The responses are weighted by who is giving the feedback. If it is my Mentor then it is instantly going into the short list, on the other hand my non-photographer friends have less weight. Audience response alone does not select a best image, but it is just another data point when I'm making my decision.
Exhibits and Shows
I entered photographs into 24 juried exhibitions and contests this past year (a blog post is coming soon about that experience). In 15 of those competitions my images were selected for the show or won a prize in the contest. This tends to make me think more highly of these images and makes it more likely that I will pick it as one of my best. However it mainly affects older images, I only submitted 2015 images in a couple of shows. But it does influence my perception of the value of my images. Several images from past years have won numerous times, so I'm inclined to think more highly of those images. :)
Analysis of My Best non-Model Photos
I find it more difficult to determine my best photos from my street and landscape photos. In general they tend towards more abstract images and that is so subjective, I ended up not picking any of my abstract street photos as my best even though I like quite a lot of them.
Shadow Walkers
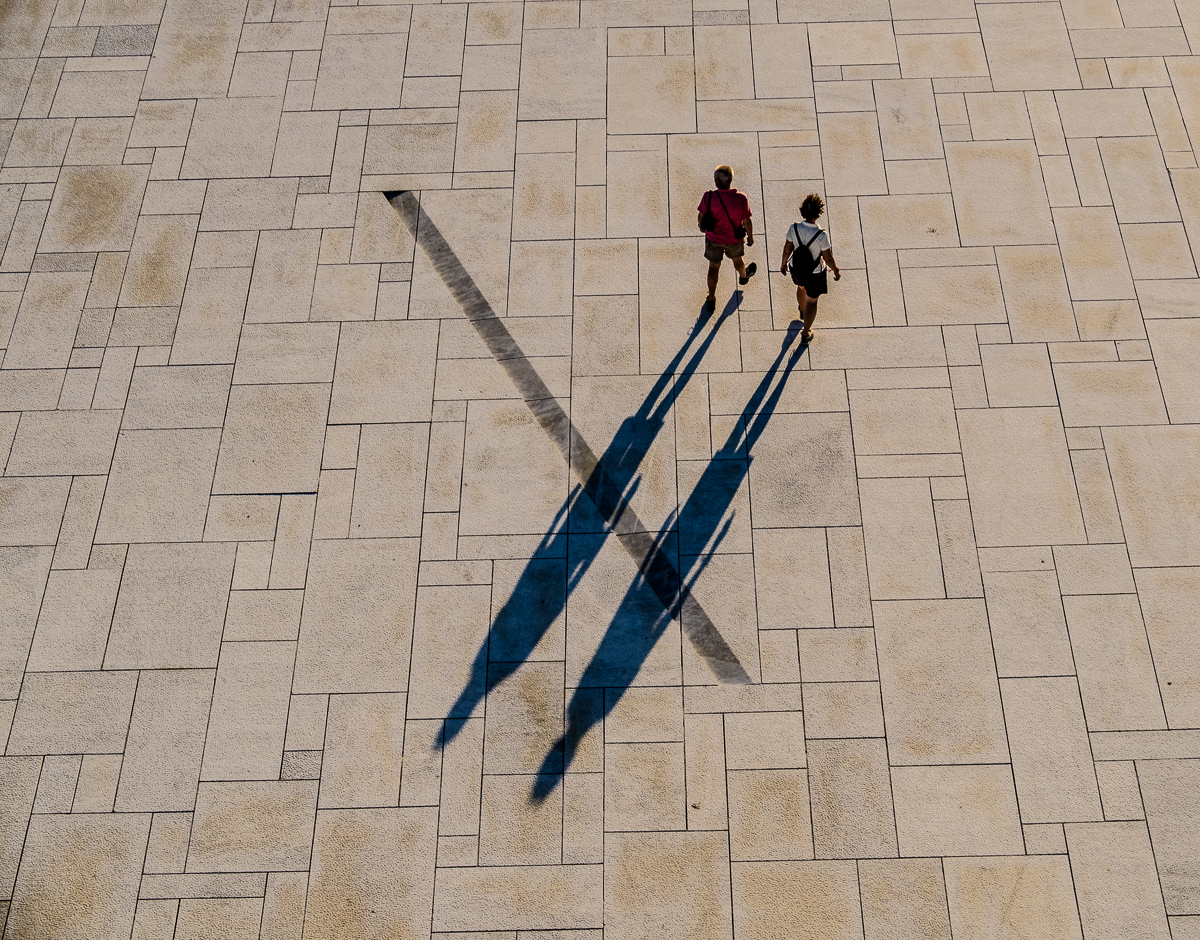 This image is all about the strong graphic 'X' created by the shadows crossing the line on the ground. This image as also gotten good audience feedback both from contests and individuals, I have had several people email me to tell me how much they like the image, that is rare.
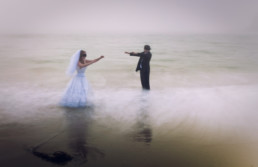
A Time to Himself
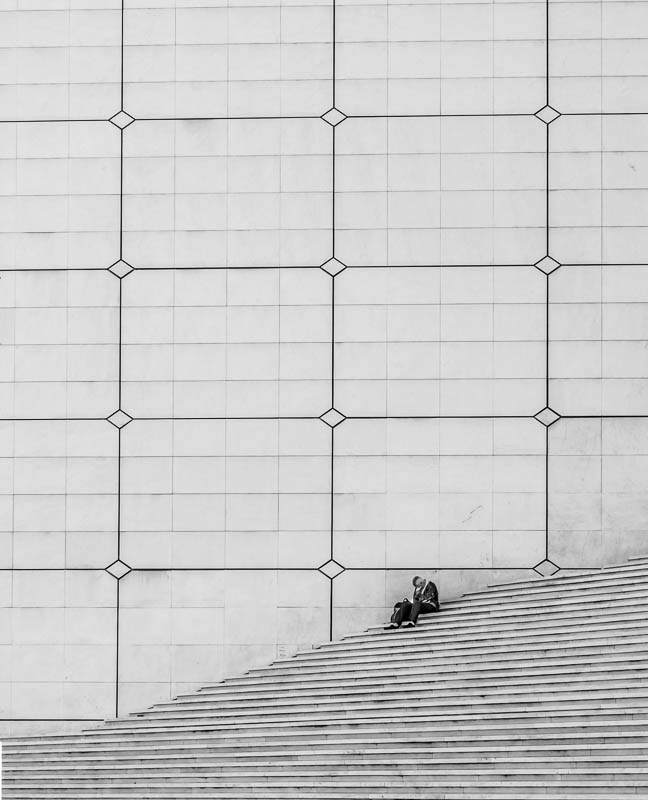 I picked this image because I think it tells a strong story and evokes an emotional response. It is also strong graphically with the huge negative space above the man, helping to strengthen the story and the feeling of isolation.
I submitted this into a critique at my local camera club and the judge suggested cropping the top, there were a dozen people in the audience who yelled "No!". It is very rare for anybody in the audience to do such a thing, but it tells me that my instinct about the graphic element of the negative space was correct. (The judge ended up giving it 3rd place).
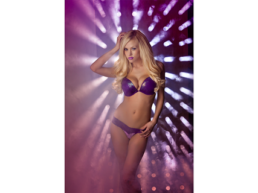
The Pose
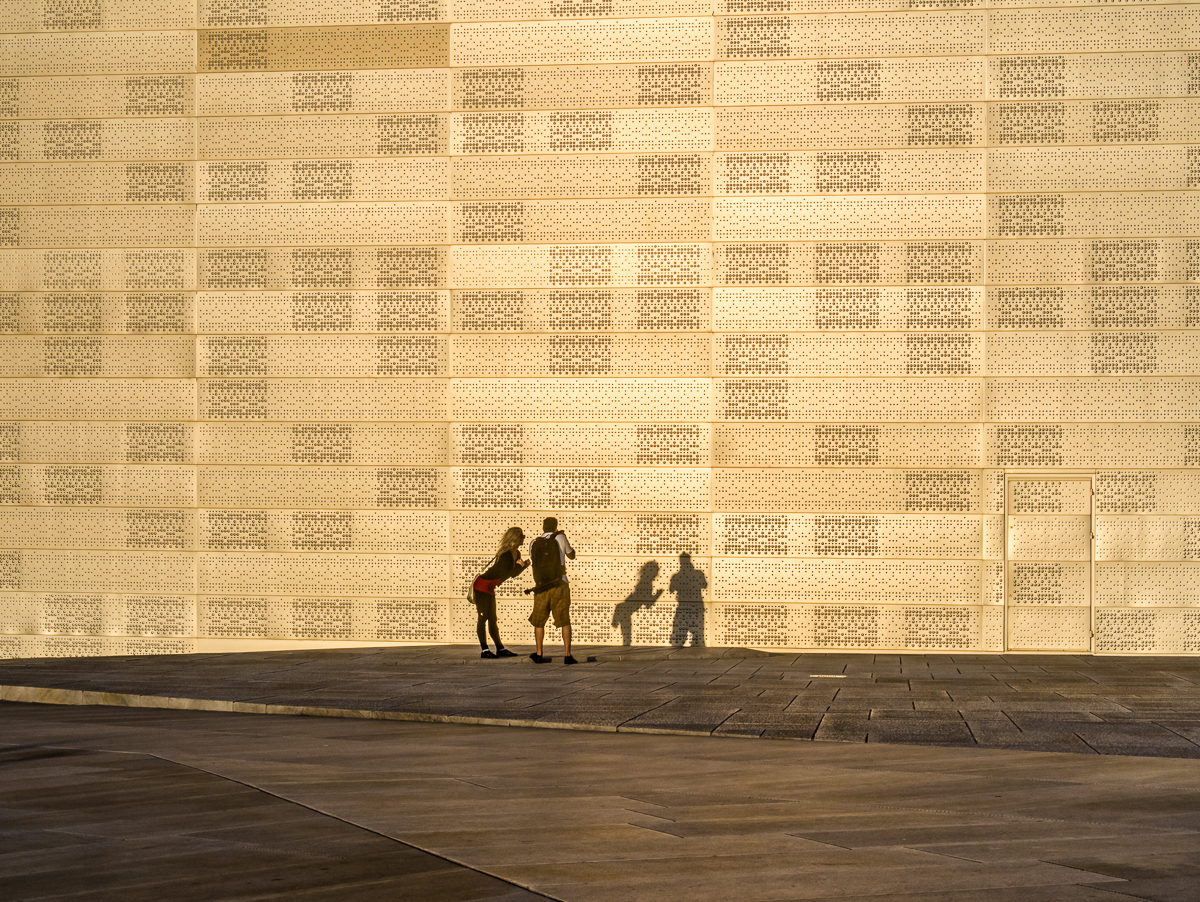 I picked this image mainly because of my own emotional attachment to it. It does tell a good story and the gold background and shadows make for a strong graphic element, but this image just barely made the cut.
Feet Above
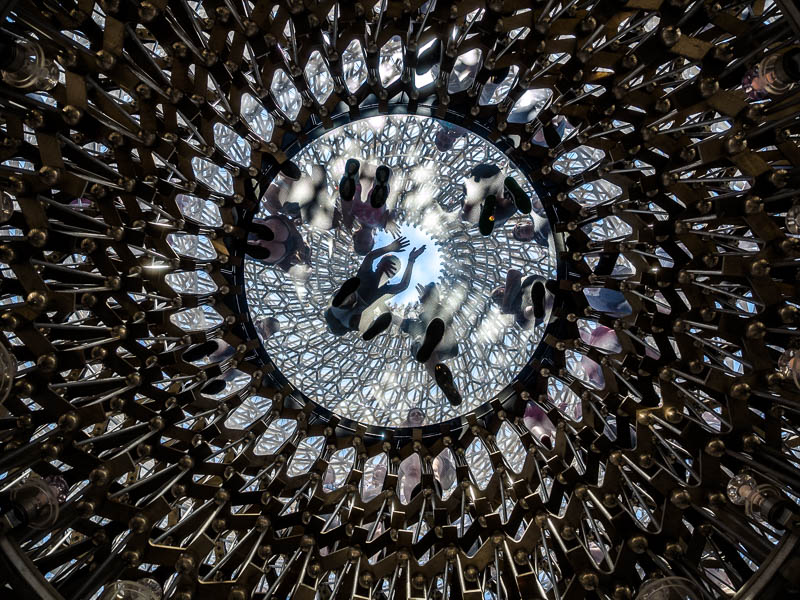
This image is the most abstract of all the best images. It has strong graphics, it also has a reasonably strong story. Audience feedback is non-verbal, instead people tend to linger on this image. Making people pause on an image is always a good thing.
Desert Road
 This image barely made the cut as one of the best images for 2015. The main reason it did was because of audience response, every person who sees this image comments on it, ohhs and ahhs, etc. I think it is because of the colors and the road is certainly a strong graphical element, however I think it is just an average image, but the audience thinks differently.
Analysis of My Best Model Photos
Reflection and Ripples

I believe this is my top image of 2015. This is more from personal emotion than anything else. Both the graphics and the story are strong, but my opinion is more subjective for this image than any other. Whenever I come across this image I just like it. Although I feel like I should know why, I can't articulate it.
What is your reaction?
Nestled
 For the past three years I have been working on a body of work of nudes in the rocks, where I try to make the human body fit into the rock landscape, this image is a great example of that.
Strong graphical elements, with the rock following the curve of her body. The story is told by the lines in the sand coming from her fingers. Without that it would just be a good image, that small element adds emotion and story and brings it into the top of the list.
Melissa Jean
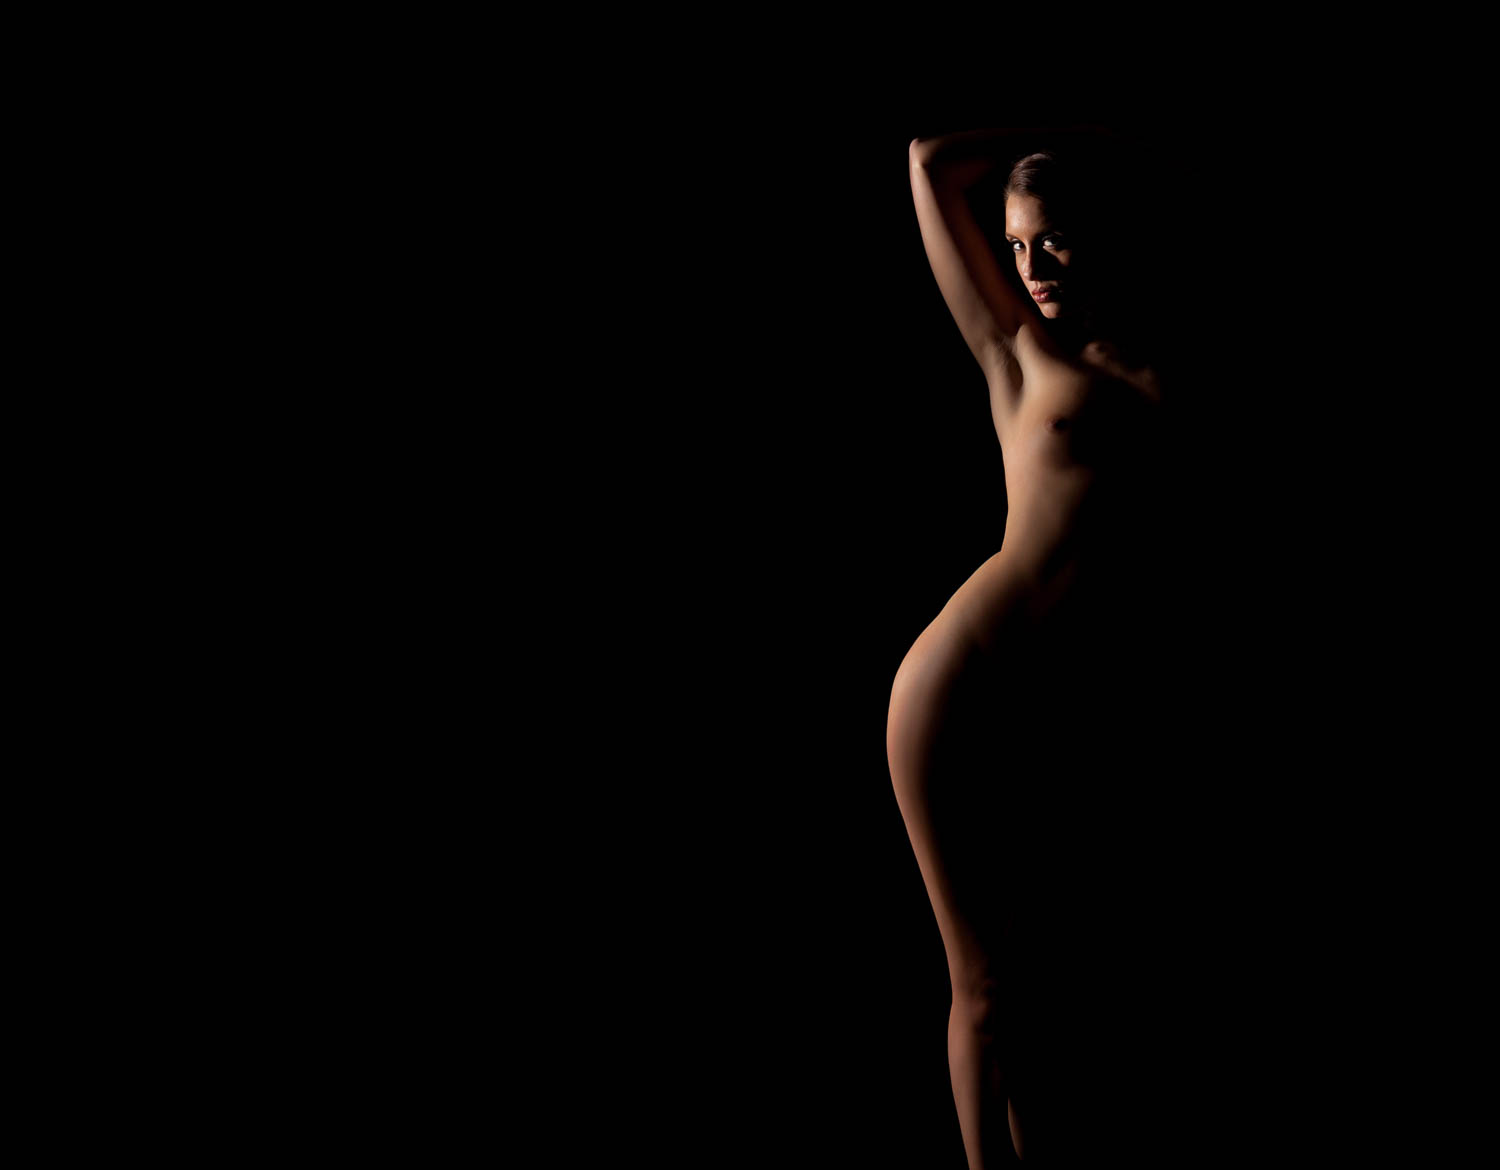
This image is all about the graphic element of the curve of her body. The negative space also adds to the graphical impact. The shadows add mystery and create a small story element, but it is dwarfed by the graphical elements.
At the Cross
 This is image has a strong story. It is an ambiguous story which is my favorite type to do in my images. It causes the viewer to pause and create their own narrative for the image. I also like the graphic elements, the minimalism, the negative space, the reflections on the floor all add together to make this image make the list.
Nude in the Rocks 4
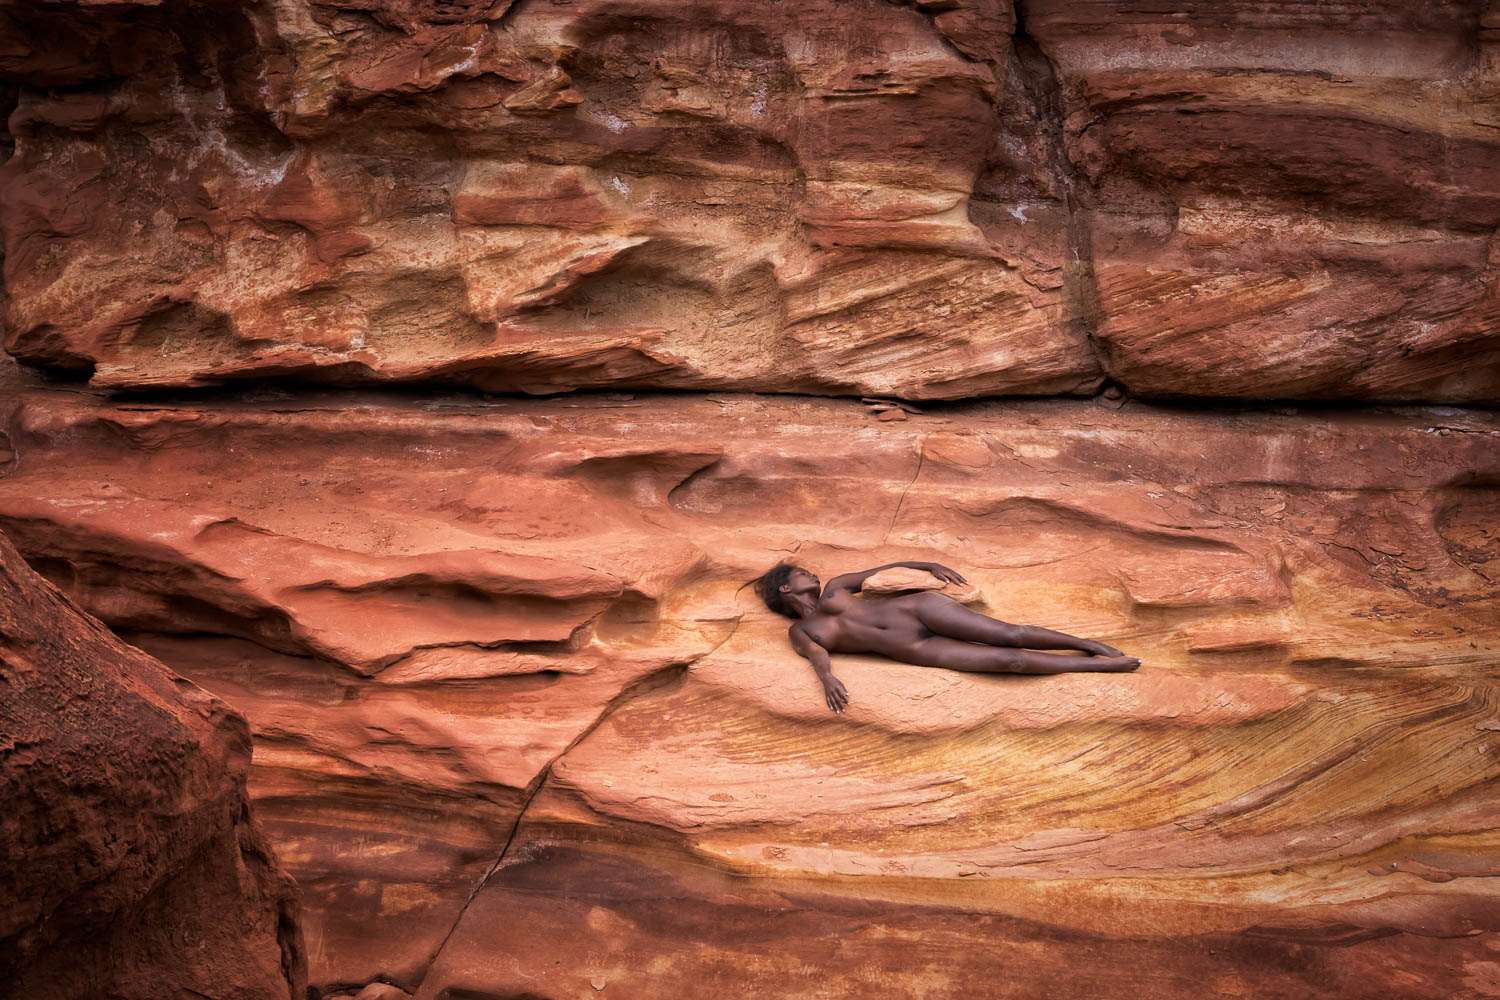 I picked this image because of the strong graphical content, the model fits into the curves of the rock, her horizontal position ties into the horizontal lines of the rocks. This image also gets a very strong audience response, partly because of the composition, but also because of the color palette, people seem to respond well to it.
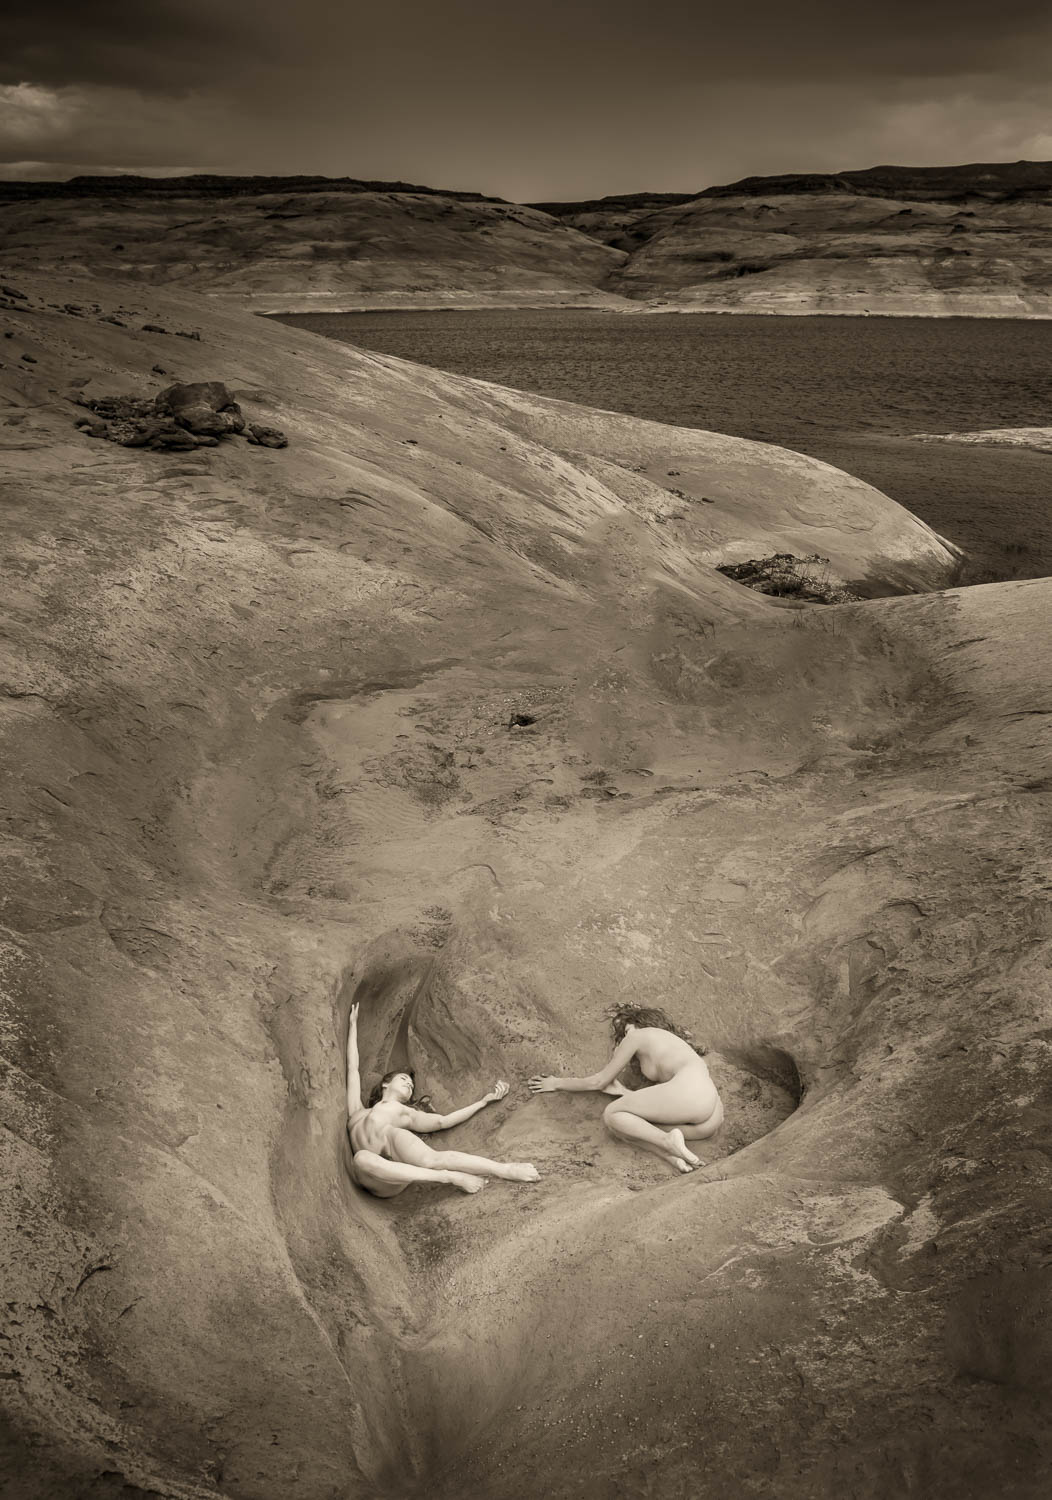
Acroyoga on the Shore
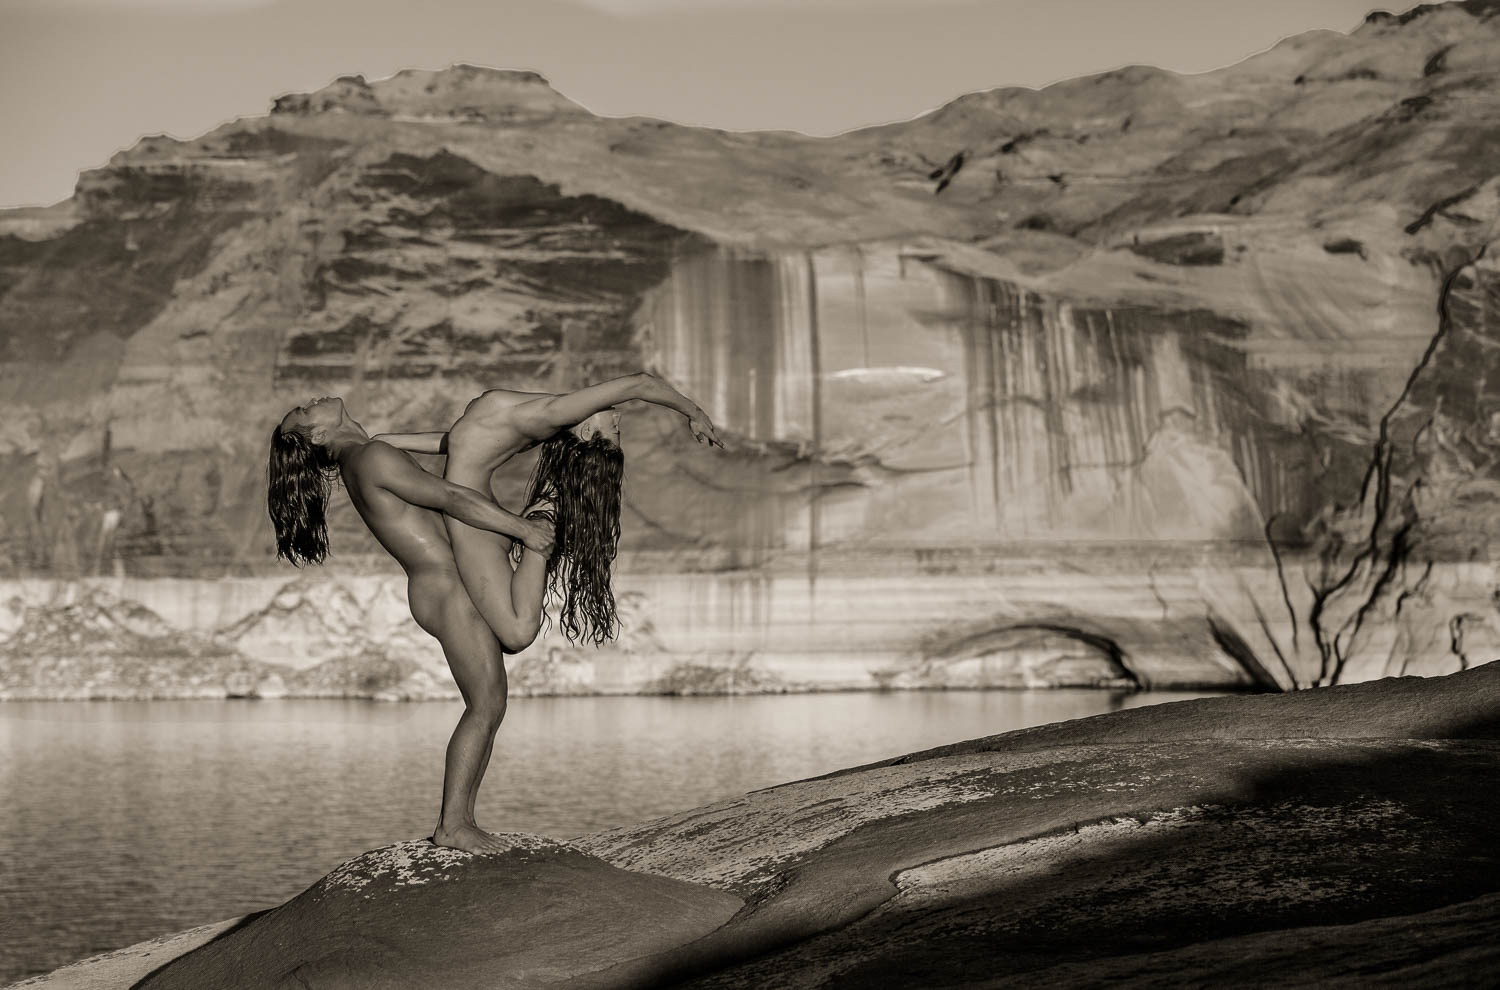 This image has a reasonably strong story but the compositional elements are the star. The shapes of the bodies are interesting, the curve of the female's body mimics the curves in the rock across the water. I deliberately framed the image so the model's hand just touched the curve in the rock.
Tasia in the Rocks
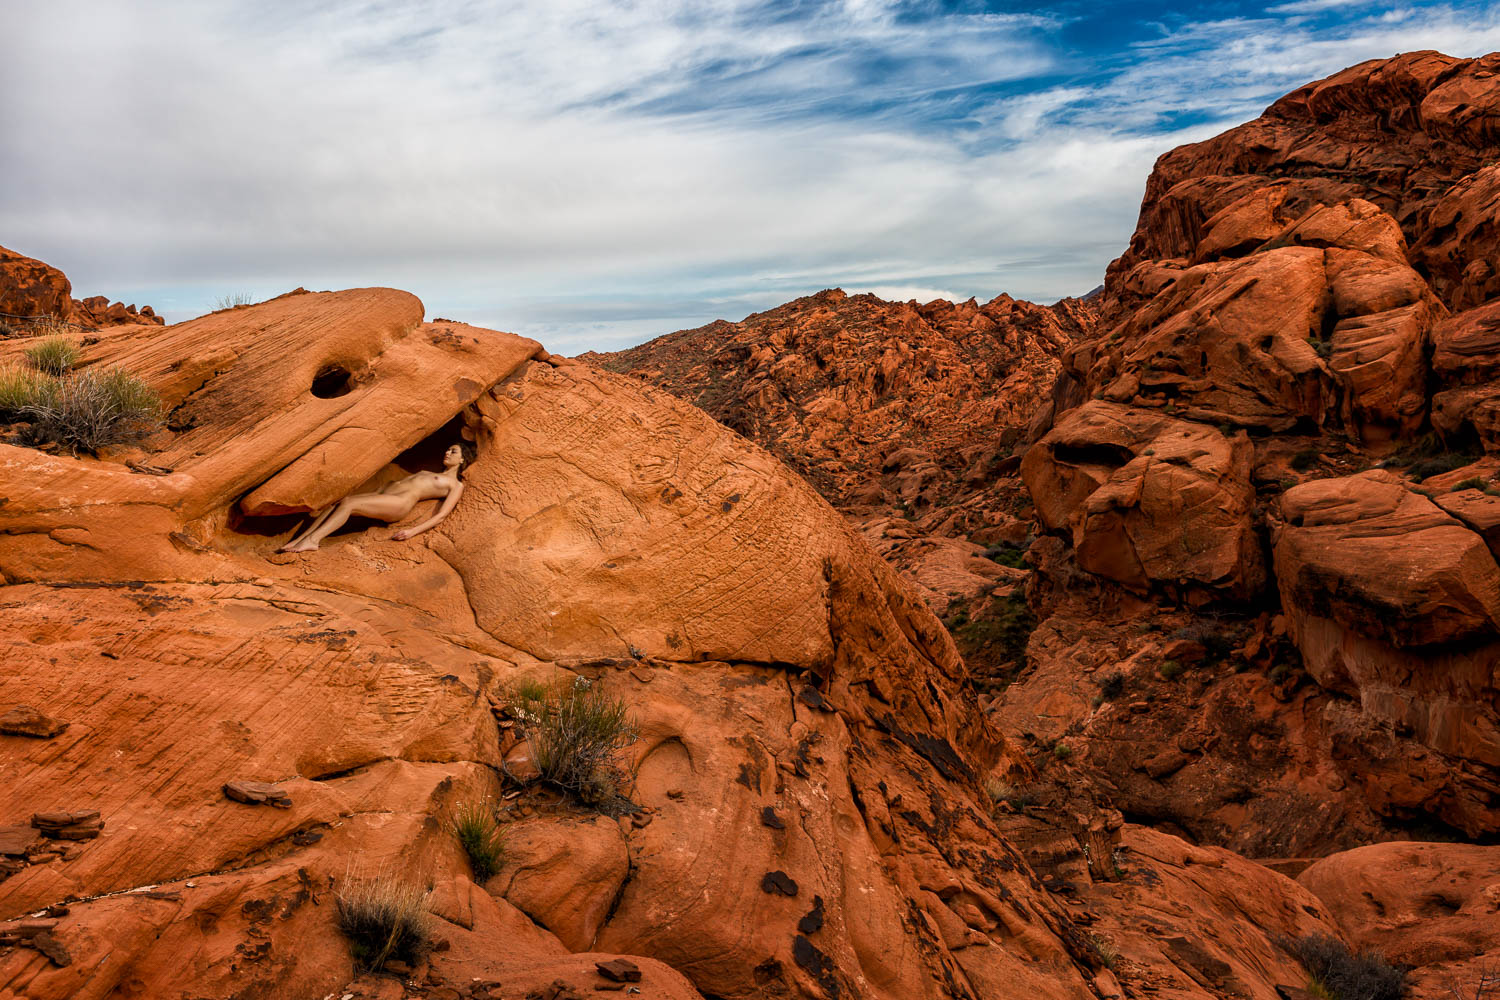 I choose this image because of the scale of the landscape vs the model. I like to call my "Find Waldo" photo. This is more of a personally emotional image. It is another one where I just like it even though it doesn't resonate with most of my audience.
All Heart
 This is another image where I like the scale of the image, the heart shape depression they are resting in is a fairly strong graphical element, their interaction is part of the story.
Lost
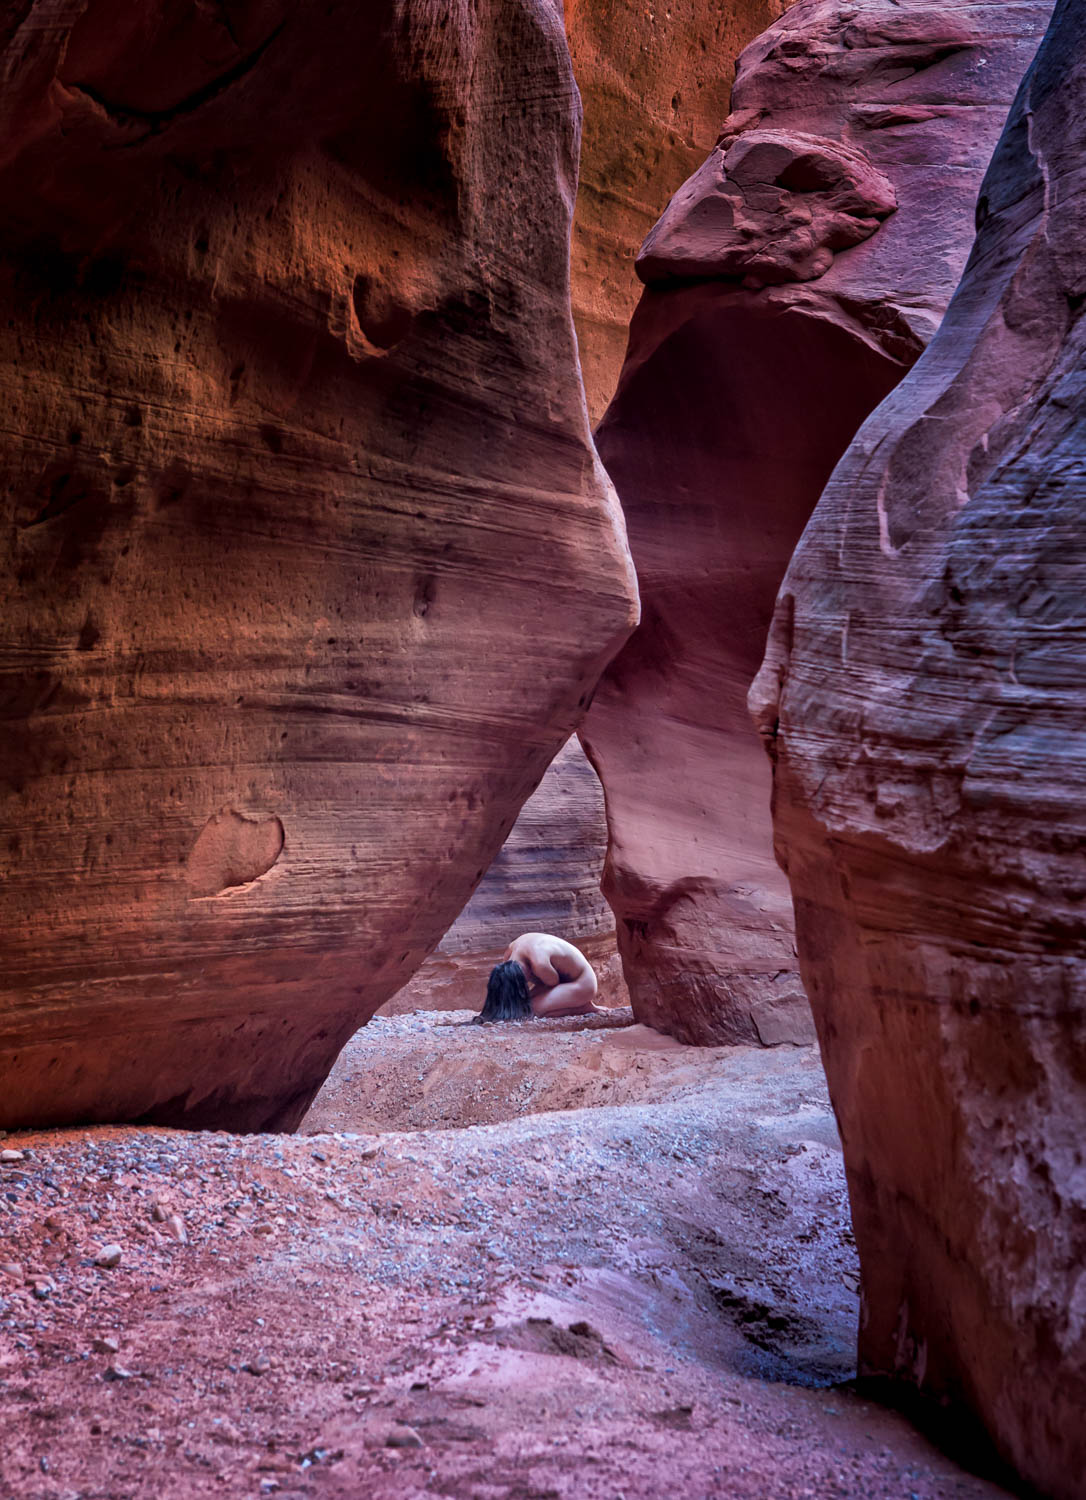 This image is about story and emotion. The canyon walls make for an interesting composition and frame the model nicely, but that is secondary to the model's pose and isolation.
Summary
So there is my thought process for why I selected these 14 images as my best of 2015. As you can see some are a little arbitrary and a month from now they could be replaced by other marginal images, that didn't quite make the cut.
Let me know your thoughts, which ones do you think shouldn't have made the cut?
Behind the Scenes Rainbow Multiscapes
This shoot was one of the most difficult shoots I have ever done but also one of the most gratifying.
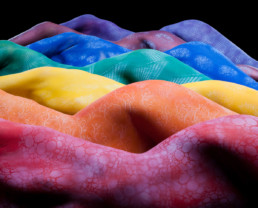
The Concept
Over the first half of 2013 I had shot and completed my Multiscapes series and was looking for a follow-on. In December of 2013 I worked with the amazing body painter Trina Merry on a shoot for Brand X Liquid Latex and was looking at some of her past work when I saw her rainbow painted hands. I had seen this photo before, but this time I had an epiphany to redo my Multiscape series with 7 models painted with the colors of the Rainbow.
The Challenge
With Trina was on board, the challenge became finding 7 models and a date that would work for all 9 of us involved. It ended up taking 3 months but we finally set a date for late March.
Construction Time
With the shoot a week away I realized that I needed something to elevate the rear-most models. With the Multiscapes where I had 5 models I used pallets and pads for the rear 3 models, but that wasn't ideal for 7 models, so I decided to build an angled platform for the models to lay on. It ended up being 8'x8' with a 16" rise from the front to the back. I thought I was all set and then 2 days before the shoot I had another shot idea where I wanted the models to sit on boxes at different heights to simulate the curve of a rainbow. So in one day I built this stand.
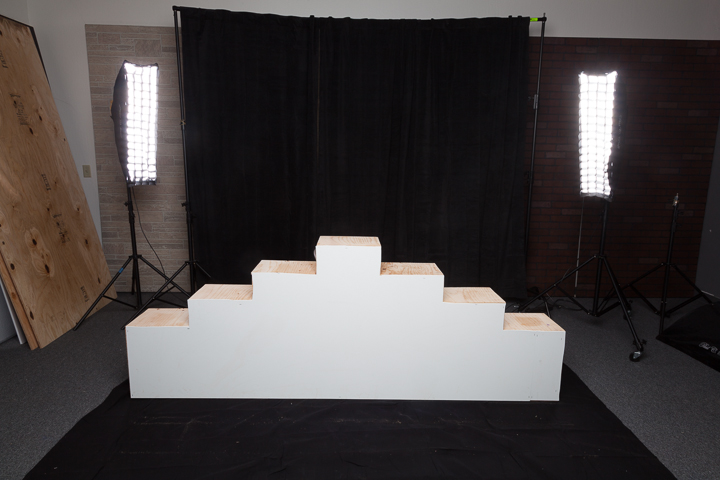
Haven't edited the photos with this prop yet, but it worked great.
A Model Flakes
The night before the shoot one of the models told me her ride flaked so she wouldn't be able to make it. I panicked at first but then realized there were a lot of ways to solve a transportation problem. So have some discussion she agreed to ride the train from San Francisco down to San Jose where I would pick her up. Crisis averted or so I thought.
Day of the Shoot
We had a 9am call and everyone was on time except for the model that was taking the train. Turns out CalTrain had a system wide computer failure that morning and the trains were a mess. The normal 1 hour ride was taking 2-2.5 hours. I texted the model that it was no problem we would just paint her last and let me know how it was going. Radio silence, no response at all from the model. I called, I texted, no response. In fact she has never communicated with me since the night before the shoot.
So I admit I did have a little panic at this point. We could do the colors of the rainbow with 6 models, but compositionally odd numbers work so much better. So Trina, myself, and all the models started contacting every model we knew trying to find a replacement. In the meantime the painting began. Around 11am I finally found a replacement model who was an hour away and was on her way. So crisis averted.
Painting the rainbow colors went relatively quickly and by noon everyone was pretty much painted, but Trina pointed out that they looked a little blah and suggested adding patterns over the base color. That sounded great so she got started only to find out that her air brush compressor wasn't working very well. So she went to her studio 20 mins away to get a replacement. We finally got back on track in the early afternoon. Adding the patterns turned out to be a long process but finally around 6pm we were ready to shoot.
The Shoot
Unfortunately I never took a shot of my setup for this shoot. For lighting I used to gridded strip boxes behind the models at 45* to the camera pointed towards the camera. I also used a 60" Parabolic umbrella on a boom arm over the models and angled slightly away from the camera.
I had a shot list with over 30 shots I wanted to get and we worked through them fairly quickly. The total shoot time was little over 2 hours. All of the models where great and we had a lot of fun on this shoot.
Behind the Scenes video of the shoot.
Behind the Scenes - Rainbow Mutliscapes from Craig Colvin Photography on Vimeo.
Credits
This shoot would not have been possible without the support of the models and Trina Merry. Thank you all.
Bodypainter
Trina Merry
Models
JenJen Wong
Syren Lestat
Anna Rose
Kerstin Tuning
Poisoned Grace
Venus Star
How I Got the Shot - Holey Wall Effect
This is first of a series of articles on "How I Got the Shot". In this installment I will describe what I call the Holey Wall effect.
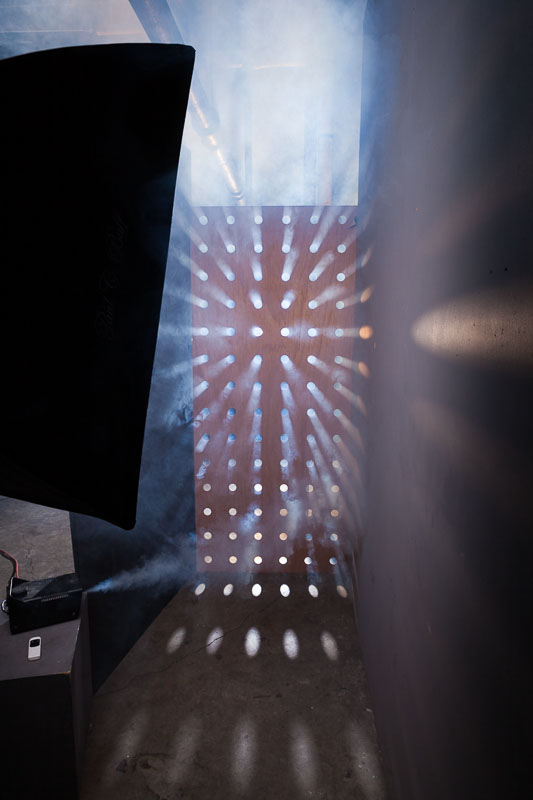
The Holey Wall effect is a relatively simple setup but it can produce some very stunning images. This is a description of how I created this effect. The basic idea is to have streams of light coming from behind your subject. You can control the shape of these streams of light by placing different gobos between the light source and your subject. For this example I constructed a wall with holes in it.
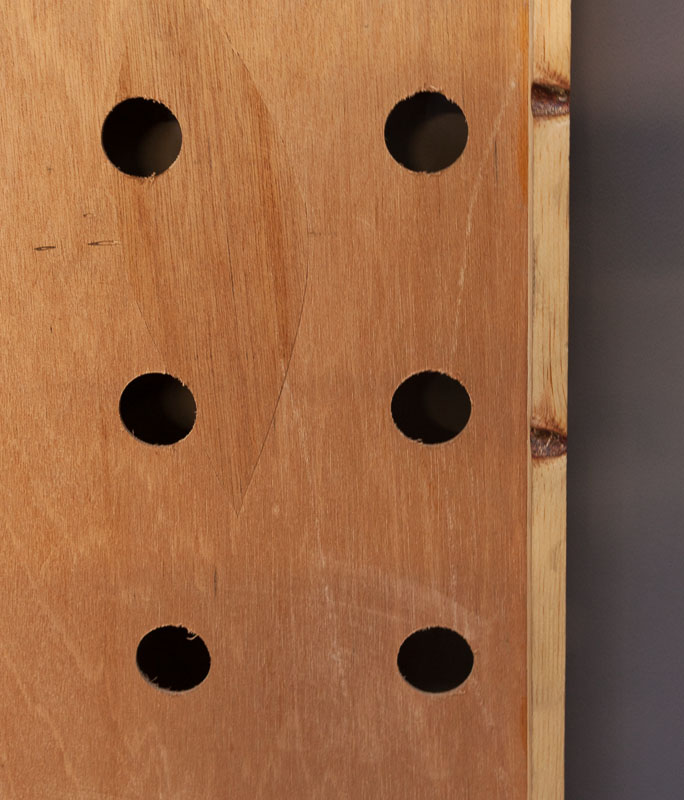
Constructing the Holey Wall
The "wall" is a piece of 3'x8'x1/16" Luan. Luan is often used for door skins and is a very thin plywood. It is so thin that if bends so I added a wooden frame two wood ribs along the back side of the sheet of Luan to give it rigidity. The ribs where created with 3/4"x3/4" Pine and runs vertically on the backside of the sheet of Luan. The holes cut into the Luan are 1-3/4 inch diameter and are spaced 6 inches apart across the entire board to end up with a grid of 6 holes horizontally and 14 holes vertically.
[one_third]
[/one_third]
[one_third]
[/one_third]
[one_third_last] [/one_third_last]
Holey Wall Alternatives
If you don't want to deal with a wood wall, the holey wall can be constructed with any other opaque material. Black foam core board would work great, as would a heavy fabric such as canvas or velvet drapes. If using fabric you want to insure that fabric is opaque and will block all the light coming from behind, except where you cut the holes.
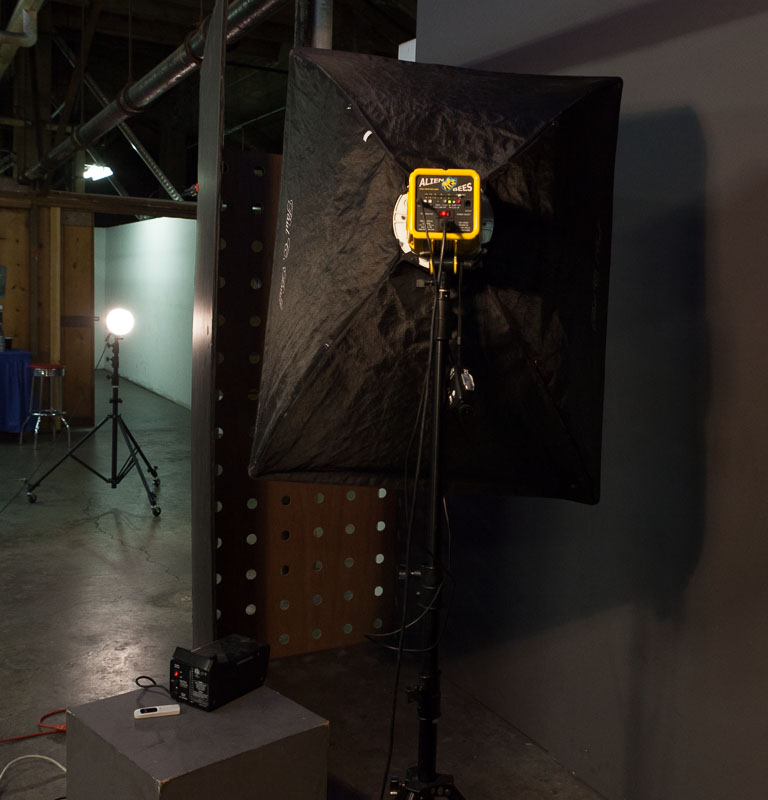
Setup
For the best effect you don't want any light coming around the side of the holey wall. There are numerous ways to accomplish this, I often use two 4'x8' form core boards, one on each side, to block the light. Another effective technique is to place the holey wall board in a doorway so the walls around the door block the light. For this example I used a wall on one side and a foam core board on the other.
Lighting
Back Lighting
The back light is what creates the beams of light coming through the holey wall. To get the best beams you want to use a hard light source behind the holey wall. I use an Alien Bee 800 with a bare reflector. The further away the light source is from the holey wall the harder the light. I place the light 12 feet away from the back of the holey wall, however if you don't have that much room I have achieved effect with the light only 6 feet away. The power should be set to 1-2 stops over the front light.
Front Lighting
I use a large softbox on the front side of the holey wall to light up my subject. This is providing fill light to the front of the subject and should not be so bright that it overpowers the beams of light. I typically will set the front light to be 1-stop under the back light.
[one_third]
[/one_third]
[one_third]

[/one_third]
[one_third_last]
 [/one_third_last]
Fog
Fog is an important component to achieving this effect, it is what causes the beams of light coming through the holes to be visible. I use a cheap fog machine that I purchased after Halloween from a Halloween store. It is not the greatest fog machine, it will produce fog for approximately 1-2 minutes after which it has to recharge for 2-3 minutes. So the shooting is sporadic, you shoot for a couple of minutes and then have to pause and wait for a couple of minutes. I plan to solve this in future shoots by having a second fog machine that I can alternate between.
I aim the fog behind the subject so it is between the subject and the holey wall. It helps to have an assistant who can direct the fog both high and low so you get complete coverage. You want to avoid having much fog between the subject and the camera. This can be a challenge and I will often have to wait until the fog has dissipated before resuming the shoot.
[one_third]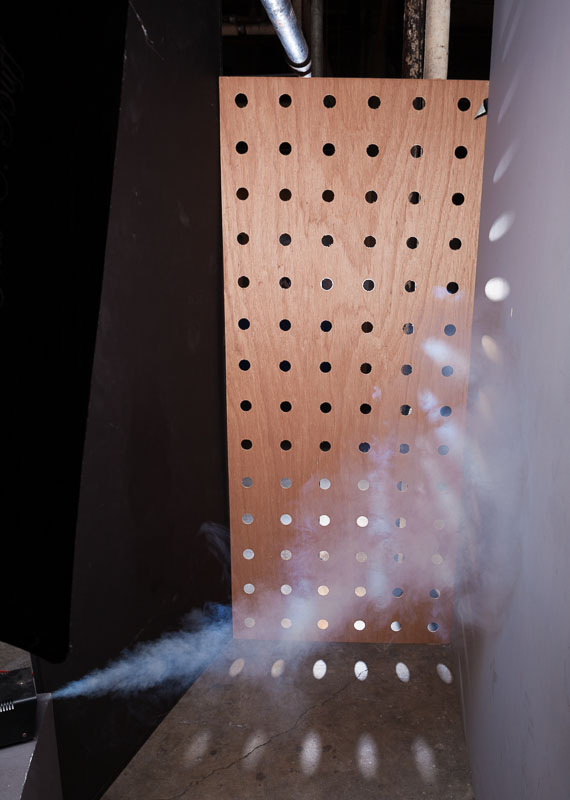
[/one_third]
[one_third]
[/one_third]
[one_third_last] [/one_third_last]
Post-processing
I do my standard Glamour post-processing (click here to download a video tutorial) techniques on these holey wall images with the exception that I only do selective skin softening. If there is fog between me and the subject I don't soften the skin behind the fog as it is not needed. To get the color effect you see in the image above I used Nik Color Efex Pro.

Conclusion
The Holey Wall technique is a relatively easy technique that can produce dramatic looking photos. Give it a try and post a link to your photos in the comments below, I would love to see them.
The plans for constructing a holey wall and lighting diagram are available for download. Click here to get a copy.
Behind the Scenes at the Brand X Liquid Latex Shoot
The above video shows the behind the scenes of the shoot but is also an advertisement for Brand X Liquid Latex and describes some of the techniques used.
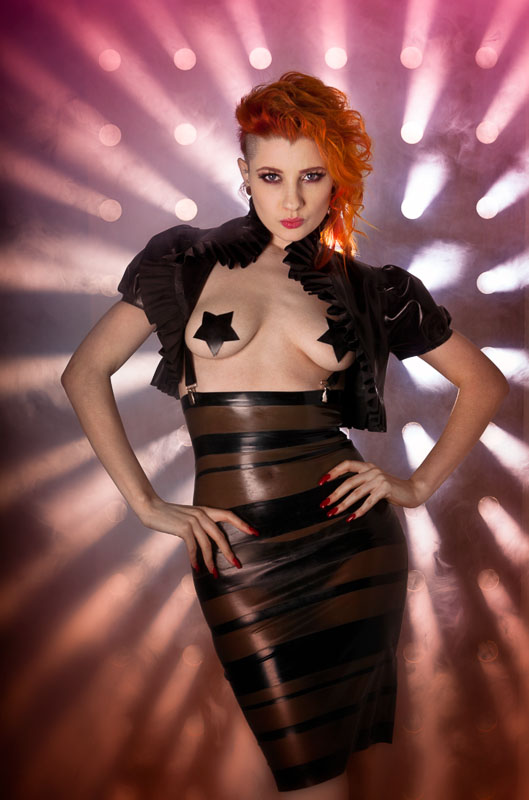
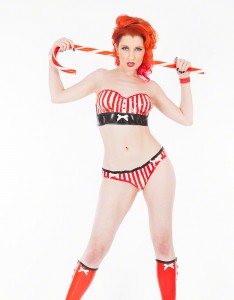
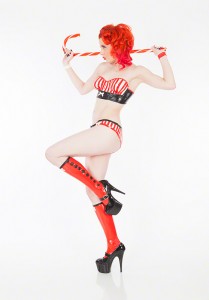
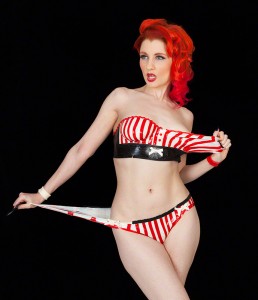
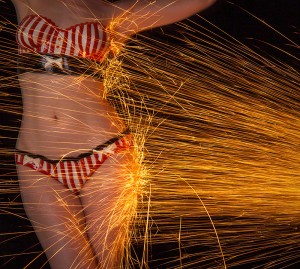
Concept
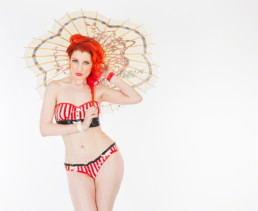
The concept was a pinup style shoot with a liquid latex pinstripe bikini painted onto the model. The model was the lovely Ulorin Vex and the body painter was the very talented Trina Merry.
This was turned out to be a challenging shoot for several reasons.
Challenge One - Space
It was cramped. The shoot was in a small conference room and had me and the full video crew competing for space. There were 4 people shooting video and timelapse with 6 cameras. They had their own lighting plus all the various video paraphernalia like sliders and boom arms.
Challenge Two - Time
Hair, makeup and body painting took over 6 hours leaving me with just a little over half-hour to shoot. Luckily Ulorin was the model, she is amazing and requires little to no direction. I would hand her a prop such as a candy cane and she would come up with amazing poses as fast as I could click the shutter. We went through a dozen concepts in 40 minutes and 90% of the photos were keepers. I could not have pulled it off without a professional model like Ulorin.
The Photos
[one_third]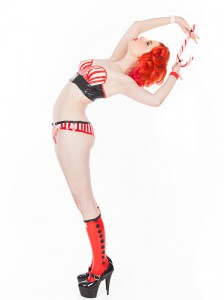 [/one_third]
[one_third]

[/one_third]
[one_third_last]
[/one_third_last]
[one_third]

[/one_third]
[one_third]
[/one_third]
[one_third_last]
[/one_third_last]
[one_third_last]
[/one_third_last]
Behind the Scenes - The Annulment and Love is Blind
Here is a first of many behind the scenes videos. This one is of the shoot that created the images "The Annulment" and "Love is Blind". I didn't have someone to man the video camera so just put it on a tripod and shot wide. Except for the fog creating water spots and haze on the lens it came out OK. Will try to improve in the future.
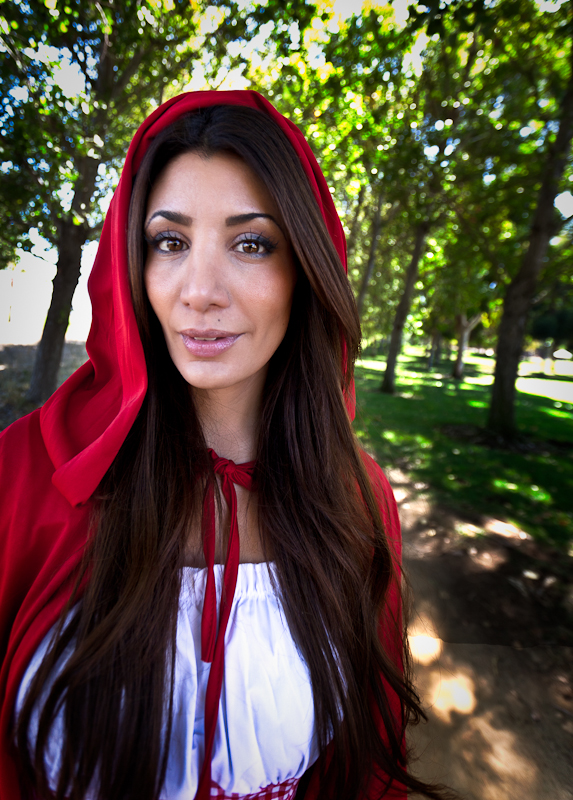
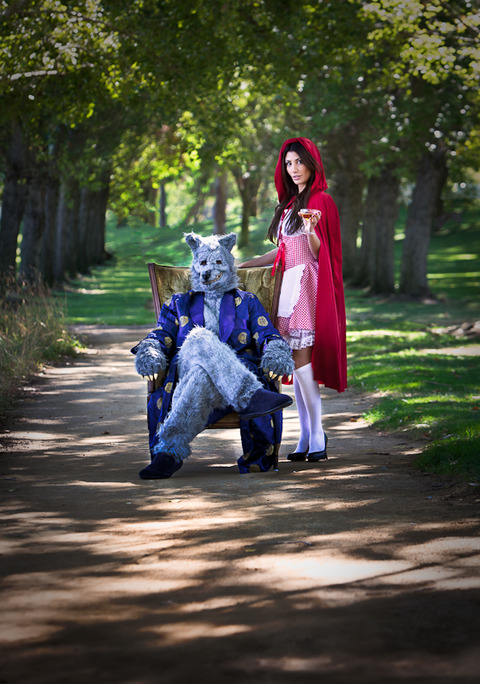
Little Red Riding Hood
I enjoy doing themed shoots and a Little Red Riding Hood theme has been on my list for a long time. My photographer friend Rebekah was doing this shoot and invitied me along because she needed someone to wear the wolf costume. We had a great time and got some pretty good shots. I would much rather have a real wolf in the shots, but the costume adds a bit of fun to the shots.
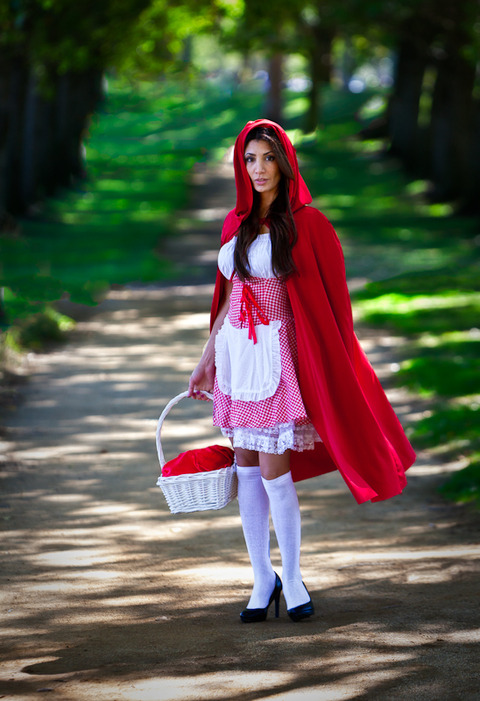
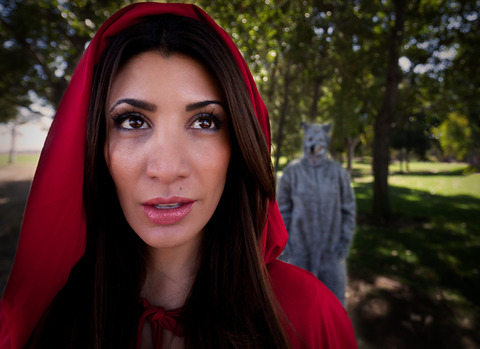
This was my favorite shot of the day. This is similar to something I've been planning and thinking on for many months so it was nice to see it come together. I'll have another post soon talking about my planning process.
Rebekah is into levitation photos, so I decided to give it a try. I don't think I did too bad for a first effort, but think I can do much better.
