Model Mixer

I was invited to a Model Mixer this past weekend at a local studio. There were 9 models and 4 photographers and I ended up spending 7 hours and shooting over 1200 photos. It was a lot of fun and I learned a lot. The models were great, some were very experienced, others it was their first modeling experience.
See the photos from the shoot here.
$2 Portrait Project
Thomas Hawk has started what he calls his $2 Portrait Project, where he gives $2 to any panhandler who asks and in exchange takes a photo of them.
I have mixed feelings about this. On the one hand I don't believe in giving money to panhandlers, after many encounters in San Francisco with aggressive panhandlers I believe giving them money just exacerbates the problem. Often it's also just helping them support a drug or alcohol problem (and before some of you say that's not the case try offering them food instead of money and they will often turn you down).
But I've also had the experience where I wanted to take photos of people on the street (especially down at Venice Beach) and they wouldn't let you take their photo unless you gave them money. So what's a street photographer to do? Is it exploiting the homeless to offer them money to take their photo? Would it better just to move on and find a willing subject that doesn't mind having their photo taken?
Giving money in exchange for a photo also takes away one of the elements of street photography that I struggle with, asking strangers if I can take a photo of them. Should I take the easy route and pay my subjects or should I work through my fear and conquer it by continuing to struggle dealing with strangers? I'm going to learn a lot more from the latter.
Photography Books
I am constantly trying to improve my photography skills and am often reading 2 or 3 different books at any one time. Here are the latest I've been reading.
Light: Science and Magic: An Introduction to Photographic Lighting
by Fil Hunter, Steven Biver, Paul Fuqua
This is a great book and has taught me so much about how to use my flash in a studio environment. It sometimes gets a little deep so I tend to read it in short sessions, maybe read a chapter, go try out the concepts then come back and re-read the chapter before moving on to the next.
Here are some of the photos I've taken using the techniques outlined in the book.

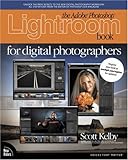
Adobe Photoshop Lightroom Book for Digital Photographers
by Scott Kelby
I had been using Lightroom for a couple of months prior to getting this book and thought I knew my way around the program. The first chapter proved that wrong. The number of shortcuts and tips in the first couple chapters completely justified the purchase of the book. I am now so much more efficient with Lightroom and these tips have significantly sped up my workflow.
Although I'm not a big fan of Scott Kelby's humorous writing style I still highly recommend this book!
Now offering Flash Gel Holders for Sale
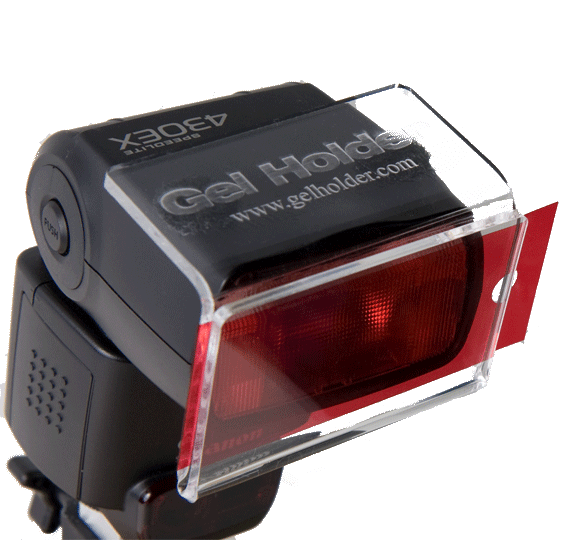
I have had a lot of requests for purchase of the Flash Gel Holders so I constructed a batch this week and am now offering them for sale for $9.95 each + shipping.

Joys of Tethered Shooting
After months of thinking about it, I finally got around to it and setup my laptop with the proper software to allow tethered shooting with my Canon DSLR. I then spend the evening doing a shoot and it was GREAT! I'm sorry I procrastinated for so long.
My normal cycle is take a few shots, check the LCD on the camera to make sure the exposure is ok. Zoom in on the LCD and see if things are in focus (can't always tell), then take approximately 10-20 shots. Take the Compact Flash card out of the camera and carry it in the study where my computer is. Import the photos into Lightroom, look at them, determine that I don't like them because of focus, or shadows, or 100 other different reasons. Schelep the card back to the camera, take another 20 shots. Lather, rinse, repeat until I get some photos in Lightroom that I'm somewhat happy with.
This if course takes hours with all of the walking back and forth and waiting for Lightroom to import the photos from the card. With the tethered shooting I saved a ton of time by being able to actually see the photos on a large screen in almost real time. I ended up having to take a lot less shots than normal to get the desired result. But there was still room for improvement.
To speed up things even more I then setup an Auto Import folder in Lightroom. Lightroom is running on my desktop computer in the study, so I shared the tethered capture folder on my laptop, pointed Lightroom at that folder and then as I took the photos they automagically got imported into Lightroom. So when I was done with the shoot I walked in and sat down at my desktop computer and all of my photos from the studio were there waiting for me!
If you are doing studio shooting and you haven't yet tried tethered shooting I highly recommend it!

An example of one of my studio photos that would have benefited greatly from having tethered shooting.
Photoshop Seminar was Great
Just got back from the Scott Kelby training seminar Photoshop CS3 for Photographers Tour in San Francisco. My head is about to explode from the amount of information I absorbed.
It was a great seminar and if you ever get the chance to go to one I would highly recommend it. Basically it covered Curves, Hue/Saturation/Lightness, and Advanced Masking/Selection techniques. There was more information presented that I did not know than information I did know so it was well worth the $79.
I got there about 20 minutes before it started and there was a short check-in line and I decided to go to the restroom first. In the 2 minutes it took me to go to the restroom a hundred people got in line and it was out the door. By the time I got in it was starting and and I didn't get the best seat, was way off to the side. Next time I will be sure to get there early. I was surprised by how popular it was, I counted over 600 people in attendance.
I am now off to try out some of my new found skills.
DIY Flash Gel Holder
I have recently started using colored gels over my strobes in a lot of shots. To hold the gel over the strobe I have been just taping it using blue tape, this left a lot to be desired. So a couple of days ago I fabricated a gel holder that attaches to the flash.
Here is the complete system consisting of the flash, gel holder, and gels from Lee. Shown is the free Lee Sample Pack. The holder also works with the Rosco Gel Sample Pack gels.
Click here for construction details on how to build your own. I now also offer these Gel Holders for sale. Visit GelHolder.com for details.
South Bay Photography Meetup
Attended the South Bay Photography Meetup this evening and had a great time chatting with the folks there and looking at all the great photos that others are taking.
I gave several of the people there a link to this blog and told them I would have a link to my photos. So here is the link to my flickr page were all my photos currently reside.
My First Post
Welcome to my blog. I will mainly use this blog to post about my current obsession which is photography. I may occasionally throw in something related to woodworking or the world in general. Have to see how it goes.
My goal is to have each bit carefully handcrafted for your reading pleasure.


