
This is first of a series of articles on “How I Got the Shot”. In this installment I will describe what I call the Holey Wall effect.
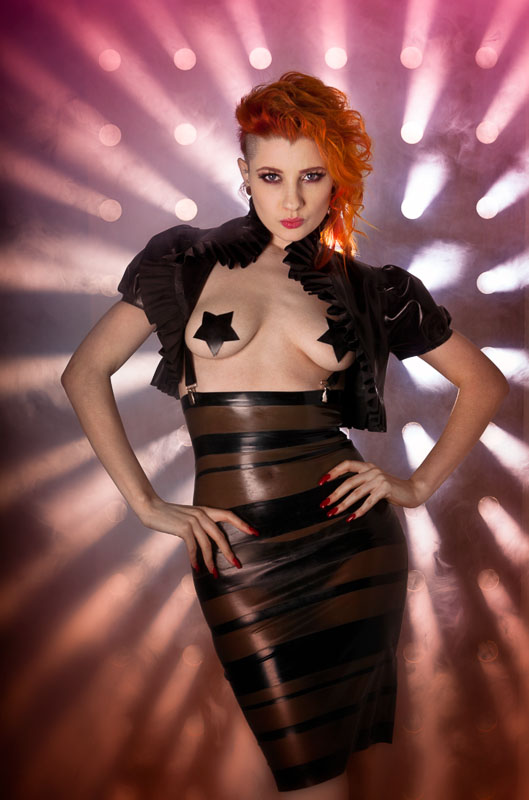
The Holey Wall effect is a relatively simple setup but it can produce some very stunning images. This is a description of how I created this effect. The basic idea is to have streams of light coming from behind your subject. You can control the shape of these streams of light by placing different gobos between the light source and your subject. For this example I constructed a wall with holes in it.
Constructing the Holey Wall
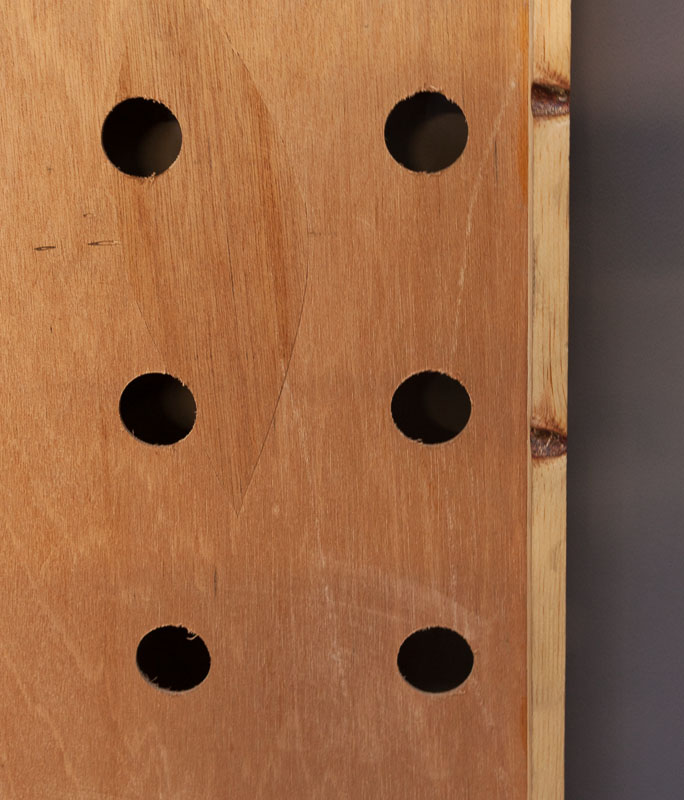
The “wall” is a piece of 3’x8’x1/16″ Luan. Luan is often used for door skins and is a very thin plywood. It is so thin that if bends so I added a wooden frame two wood ribs along the back side of the sheet of Luan to give it rigidity. The ribs where created with 3/4″x3/4″ Pine and runs vertically on the backside of the sheet of Luan. The holes cut into the Luan are 1-3/4 inch diameter and are spaced 6 inches apart across the entire board to end up with a grid of 6 holes horizontally and 14 holes vertically.
[one_third]
[/one_third] [one_third]
[/one_third] [one_third_last] [/one_third_last]
Holey Wall Alternatives
If you don’t want to deal with a wood wall, the holey wall can be constructed with any other opaque material. Black foam core board would work great, as would a heavy fabric such as canvas or velvet drapes. If using fabric you want to insure that fabric is opaque and will block all the light coming from behind, except where you cut the holes.
Setup
For the best effect you don’t want any light coming around the side of the holey wall. There are numerous ways to accomplish this, I often use two 4’x8′ form core boards, one on each side, to block the light. Another effective technique is to place the holey wall board in a doorway so the walls around the door block the light. For this example I used a wall on one side and a foam core board on the other.
Lighting
Back Lighting
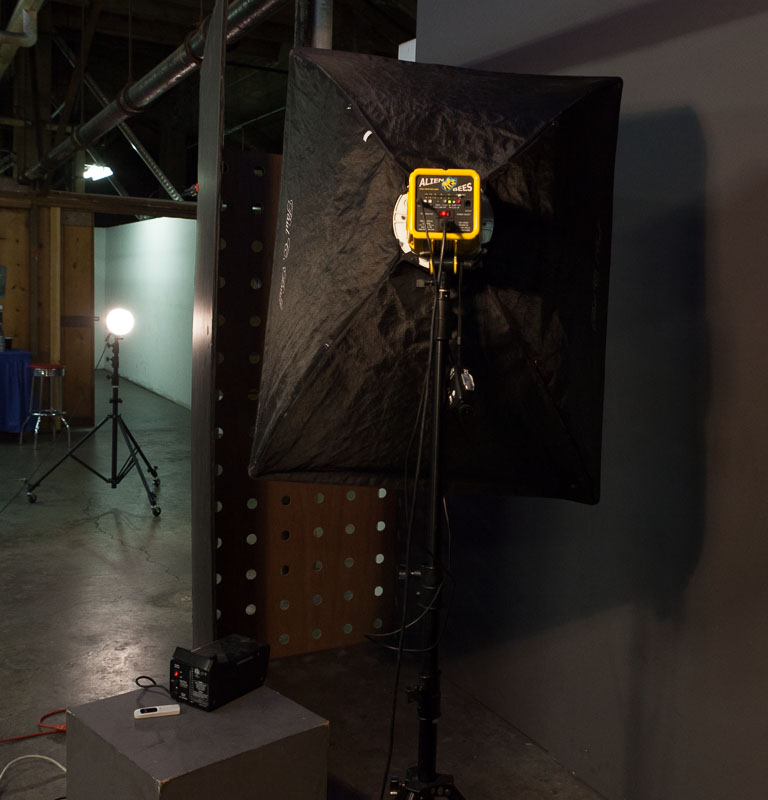
The back light is what creates the beams of light coming through the holey wall. To get the best beams you want to use a hard light source behind the holey wall. I use an Alien Bee 800 with a bare reflector. The further away the light source is from the holey wall the harder the light. I place the light 12 feet away from the back of the holey wall, however if you don’t have that much room I have achieved effect with the light only 6 feet away. The power should be set to 1-2 stops over the front light.
Front Lighting
I use a large softbox on the front side of the holey wall to light up my subject. This is providing fill light to the front of the subject and should not be so bright that it overpowers the beams of light. I typically will set the front light to be 1-stop under the back light.
[one_third]
[/one_third] [one_third]

[/one_third] [one_third_last]
 [/one_third_last]
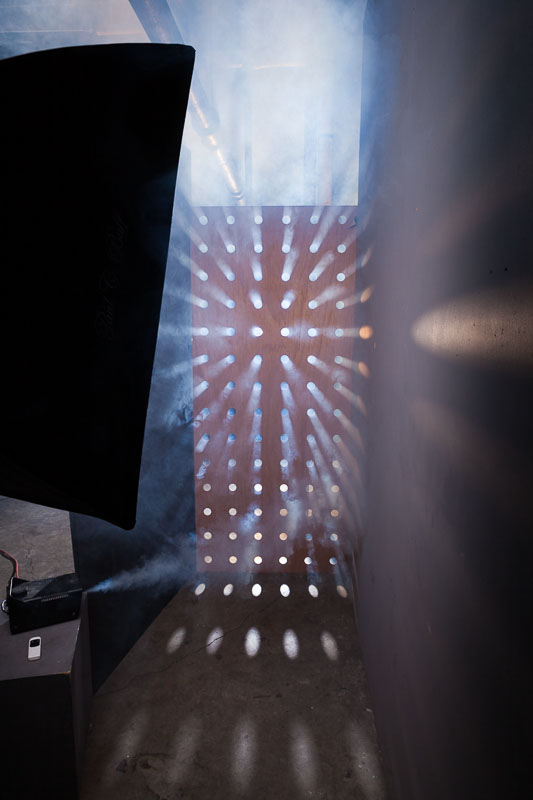
Fog
Fog is an important component to achieving this effect, it is what causes the beams of light coming through the holes to be visible. I use a cheap fog machine that I purchased after Halloween from a Halloween store. It is not the greatest fog machine, it will produce fog for approximately 1-2 minutes after which it has to recharge for 2-3 minutes. So the shooting is sporadic, you shoot for a couple of minutes and then have to pause and wait for a couple of minutes. I plan to solve this in future shoots by having a second fog machine that I can alternate between.
I aim the fog behind the subject so it is between the subject and the holey wall. It helps to have an assistant who can direct the fog both high and low so you get complete coverage. You want to avoid having much fog between the subject and the camera. This can be a challenge and I will often have to wait until the fog has dissipated before resuming the shoot.
[one_third]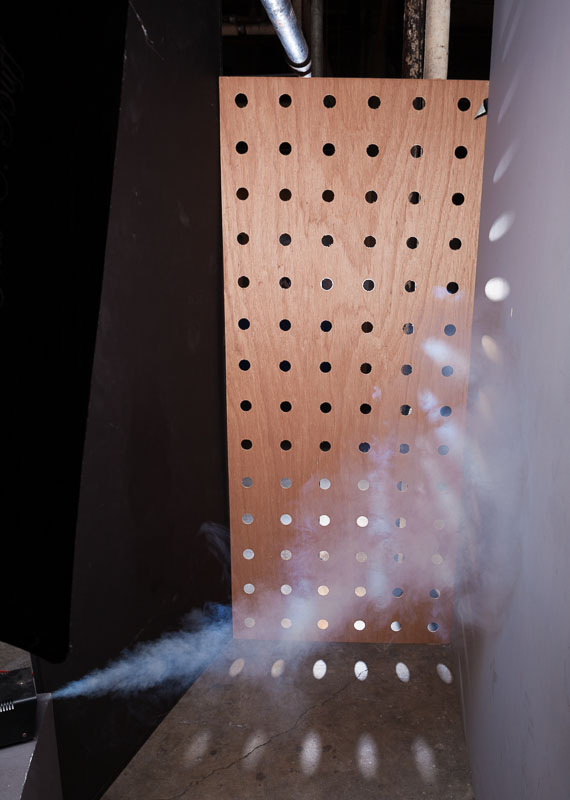
[/one_third] [one_third]
[/one_third] [one_third_last] [/one_third_last]
Post-processing
I do my standard Glamour post-processing (click here to download a video tutorial) techniques on these holey wall images with the exception that I only do selective skin softening. If there is fog between me and the subject I don’t soften the skin behind the fog as it is not needed. To get the color effect you see in the image above I used Nik Color Efex Pro.

Conclusion
The Holey Wall technique is a relatively easy technique that can produce dramatic looking photos. Give it a try and post a link to your photos in the comments below, I would love to see them.
The plans for constructing a holey wall and lighting diagram are available for download. Click here to get a copy.
Thanks for sharing. Love it!