Palm Springs Photo Festival 2014
I just returned from a week at the Palm Springs Photo Festival. It was my first time going and won't be my last. If you are not familiar with the festival it is an annual event and is in it's 10th year. It has an unusual mix of professional photographers. covering the spectrum from commercial photographers to fine art photographers. Many of the workshops are taught by working photographers who have never taught or shared how they do their photography before. I'm used to going to workshops or conferences where the person teaching had become more a photography educator and than an actual working photographer. A lot of this is just the nature of the industry today, it is getting harder and harder to make a living as a professional photographer, so they supplement their income by teaching classes. While there were a few instructors at the Palm Springs Photo Festival that fit that pattern, there seemed to be more who don't regularly teach. I don't know if this is a good thing or not, but I found it interesting. It also meant I got to take a workshop from someone I would otherwise never get to learn from. One of my inspirations...
Glen Wexler
Glen is a successful commercial photographer that started off shooting record companies and then expanded into to shooting ad campaigns. His work is engaging and unusual. He relies a lot on composititing and that was what first attracted me to his work. This was the first time that Glen had ever taught a class and he went into great depth and detail about his work and how he accomplishes his shots. It was very educational and is going to change the way I approach my conceptual photography in the future. For instance he almost always shoots his backgrounds first then works on the foreground elements. The idea being that it is easier to match the background lighting in the studio when shooting the foreground elements. He also shoots a lot of miniatures, both miniature sets and objects that are placed into the composition.
Symposiums
Each night there would be a Symposium where one or two of the instructors would do a presentation about themselves and their work. After attending the first night it became a must attend event every evening. Some of the presentations were very moving, some very funny, but every single one of them was inspiring in one way or another.
Inspiration and Recharging
Speaking of inspiration I had a conversation with a fellow photographer one evening and she commented that the best thing about conferences like this was only the workshops, portfolio reviews, and talks, but just being around other photographers that shared your passion and that it was impossible to come to and event like this and not leave recharged and inspired.
I know that is the case for me, I get so caught up in my day to day work and the drudgery of post-processing 40 photos from a shoot I promised to do for a friend's birthday party that I slowly stop coming up with ideas of what to shoot, or even the desire to go out and shoot. But everything I go to a photography workshop, conference, or event I come back ready to go with more ideas than I can possible shoot. Can you relate to that?
Next Year
I'm already marking my calendar for next year's Palm Springs Photo Festival. Come join me, I'll buy you a beer.
How I Got the Shot - Holey Wall Effect
This is first of a series of articles on "How I Got the Shot". In this installment I will describe what I call the Holey Wall effect.
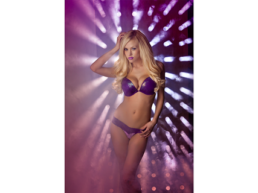
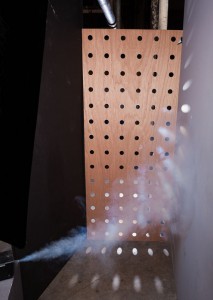
The Holey Wall effect is a relatively simple setup but it can produce some very stunning images. This is a description of how I created this effect. The basic idea is to have streams of light coming from behind your subject. You can control the shape of these streams of light by placing different gobos between the light source and your subject. For this example I constructed a wall with holes in it.
Constructing the Holey Wall
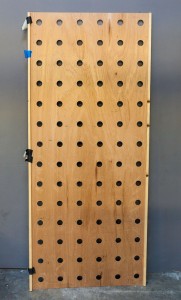
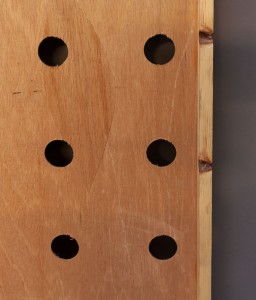
The "wall" is a piece of 3'x8'x1/16" Luan. Luan is often used for door skins and is a very thin plywood. It is so thin that if bends so I added a wooden frame two wood ribs along the back side of the sheet of Luan to give it rigidity. The ribs where created with 3/4"x3/4" Pine and runs vertically on the backside of the sheet of Luan. The holes cut into the Luan are 1-3/4 inch diameter and are spaced 6 inches apart across the entire board to end up with a grid of 6 holes horizontally and 14 holes vertically.
[/one_third]
[one_third]
[/one_third]
[one_third_last] [/one_third_last]
Holey Wall Alternatives
If you don't want to deal with a wood wall, the holey wall can be constructed with any other opaque material. Black foam core board would work great, as would a heavy fabric such as canvas or velvet drapes. If using fabric you want to insure that fabric is opaque and will block all the light coming from behind, except where you cut the holes.
Setup
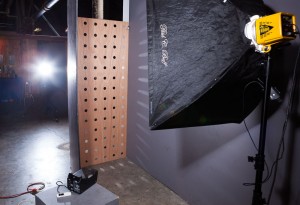
For the best effect you don't want any light coming around the side of the holey wall. There are numerous ways to accomplish this, I often use two 4'x8' form core boards, one on each side, to block the light. Another effective technique is to place the holey wall board in a doorway so the walls around the door block the light. For this example I used a wall on one side and a foam core board on the other.
Lighting
Back Lighting
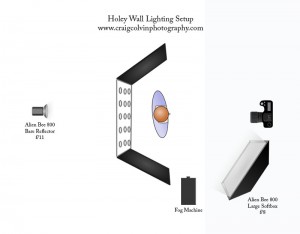
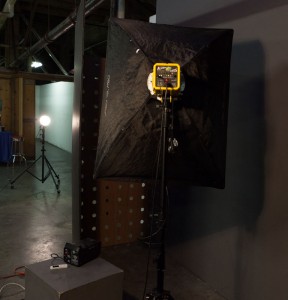
The back light is what creates the beams of light coming through the holey wall. To get the best beams you want to use a hard light source behind the holey wall. I use an Alien Bee 800 with a bare reflector. The further away the light source is from the holey wall the harder the light. I place the light 12 feet away from the back of the holey wall, however if you don't have that much room I have achieved effect with the light only 6 feet away. The power should be set to 1-2 stops over the front light.
Front Lighting
I use a large softbox on the front side of the holey wall to light up my subject. This is providing fill light to the front of the subject and should not be so bright that it overpowers the beams of light. I typically will set the front light to be 1-stop under the back light.
[/one_third]
[one_third]
[/one_third]
[one_third_last]
 [/one_third_last]
Fog
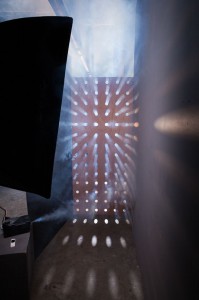
Fog is an important component to achieving this effect, it is what causes the beams of light coming through the holes to be visible. I use a cheap fog machine that I purchased after Halloween from a Halloween store. It is not the greatest fog machine, it will produce fog for approximately 1-2 minutes after which it has to recharge for 2-3 minutes. So the shooting is sporadic, you shoot for a couple of minutes and then have to pause and wait for a couple of minutes. I plan to solve this in future shoots by having a second fog machine that I can alternate between.
I aim the fog behind the subject so it is between the subject and the holey wall. It helps to have an assistant who can direct the fog both high and low so you get complete coverage. You want to avoid having much fog between the subject and the camera. This can be a challenge and I will often have to wait until the fog has dissipated before resuming the shoot.
[/one_third]
[one_third]
[/one_third]
[one_third_last] [/one_third_last]
Post-processing
I do my standard Glamour post-processing (click here to download a video tutorial) techniques on these holey wall images with the exception that I only do selective skin softening. If there is fog between me and the subject I don't soften the skin behind the fog as it is not needed. To get the color effect you see in the image above I used Nik Color Efex Pro.

Conclusion
The Holey Wall technique is a relatively easy technique that can produce dramatic looking photos. Give it a try and post a link to your photos in the comments below, I would love to see them.
The plans for constructing a holey wall and lighting diagram are available for download. Click here to get a copy.
Plan to Improve your Photography in 2014
Almost every photographer I talk to wants to improve their photography. But when I ask them how they are doing that, they will have no plan or just vague thoughts about perhaps getting around to watching some online tutorial. Not a very efficient or practical way to improve.
Photographic Goals
- Become a Better Photographer
- Grow my Photography Audience
- Create Epic Photos
What's Your Target
Create a Roadmap
- Become a Better Photographer
- Attend one workshop or conference every quarter
- 30 mins of photography education every day (see this blog post)
- Schedule one photowalk every month
- Schedule one photography trip every quarter (Oregon Coast, Zion, Boston, Page)
- Grow my Photography Audience
- Post 2 photos/week on social media sites
- Submit every new project to print publications until it is published
- Enter a photo contest very month
- Pursue and participate in a galley show every quarter
- Create Epic Photos
- Schedule one large production shoot every quarter
- Complete 4 current photo projects
- Shoot Multiscapes II in January
- Shoot one conceptual photo each month
- Schedule 3 shoots to complete Paper Doll project
- Edit and compile Reflections photos
- Start 4 new projects
Plan to Improve Your Photography in 2014
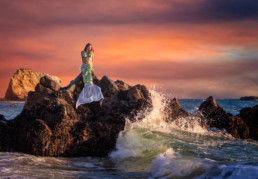
Turning a Crappy Photo Into a Keeper
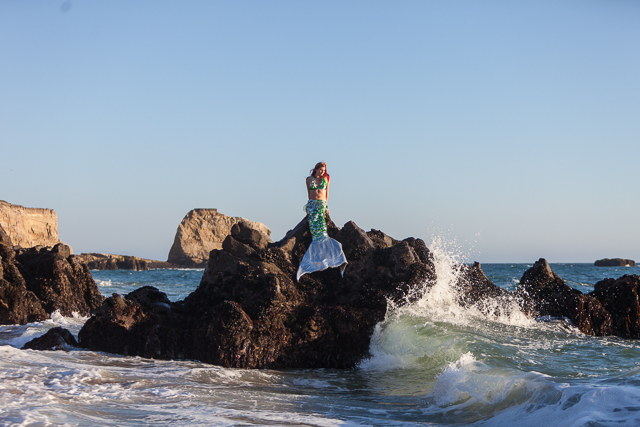
They Were All Rejects
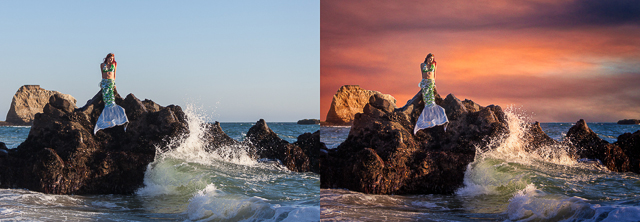
Trying To Salvage the Shot
The Sky Sucked
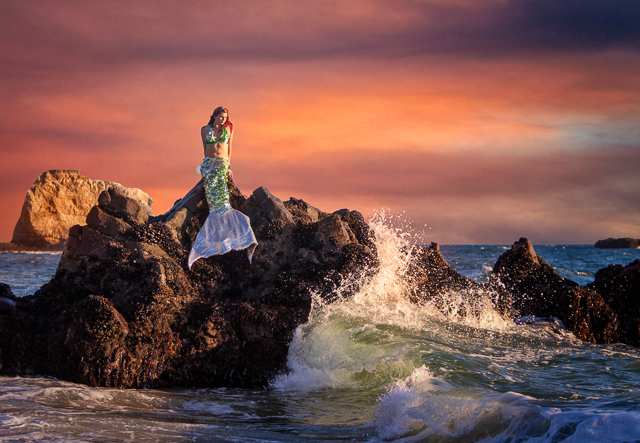
The 10 Minute Photoshop Job
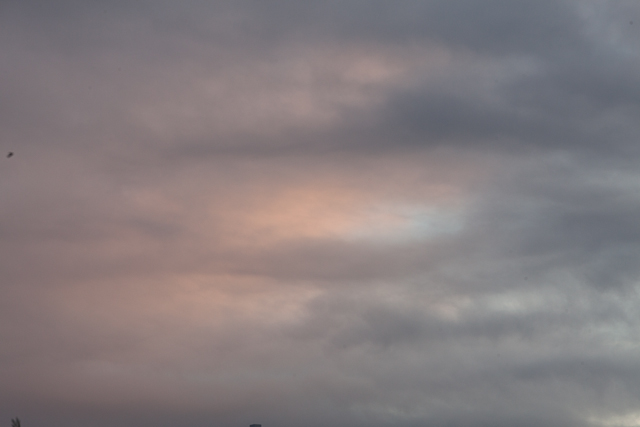
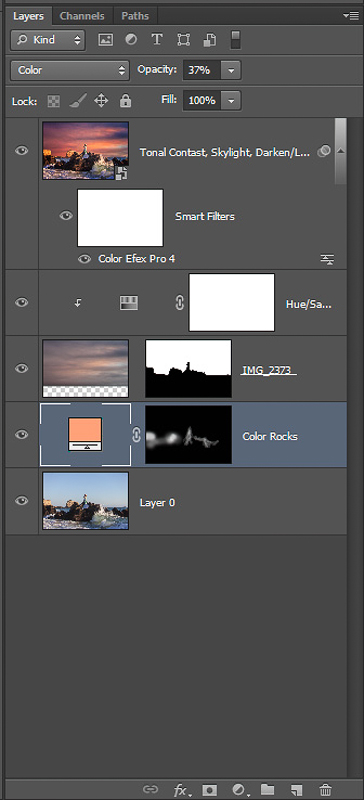
- Add clouds. Used Quick Selection Tool to select blue sky, added my cloud image as a layer and made a mask from the selection. A couple of minutes of cleanup on the mask around the wave and rocks.
- Change color of the rocks. Sample reddish color from the clouds, add a solid color layer with the blend mode set to "Color", then with a soft brush set to 10% opacity I paint in the color onto the rocks in the background
- Change cloud color to be more red and increase saturation
- Use Color Effect Pro 4 filter, Tonal Contrast, Skylight filter, and Darken/Lighten Center.
- Back in Lightroom I cropped the image and I was done.
Final Result
How About Your Images?
Behind the Scenes - The Annulment and Love is Blind
Here is a first of many behind the scenes videos. This one is of the shoot that created the images "The Annulment" and "Love is Blind". I didn't have someone to man the video camera so just put it on a tripod and shot wide. Except for the fog creating water spots and haze on the lens it came out OK. Will try to improve in the future.

