
Gregory Crewdson, Fallen Idol?
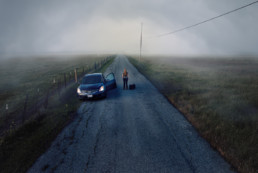
When I discovered the work of Gregory Crewdson, a few years ago, I was in awe. His work resonated with me, I believe partly because it was the style of work that I found myself doing in my own photography. I want to make photos that look like a snapshot from a movie, that tell a story, that suck the viewer in and make them question what the image is about. The photo above was inspired by Gregory's work and I was very pleased with the end result. When I show this photo, people often comment that it is very reminiscent of Crewdson's work which I take as a compliment.
Gregory Crewdson Documentary
So when I saw that there a documentary about Gregory Crewdson and his work (Gregory Crewdson: Brief Encounters) I immediately found it on Netflix and started watching. However as I watched I became more and more depressed. Here was my photography idol, the man who's style I want to emulate, and the more I watched the sadder I got. After a while I stopped and asked myself why? Why, is watching him create some of my favorite photos so depressing? It turns out there was not one single reason for this sadness, but many.
Crewdson Shoots Are Huge
Crewdson has a huge budget, many of his shoots are done on a sound stage with a crew of consisting of hundreds of people who build a complete set, find the props, paint the set, bring in snow, dirt, mud, etc. to achieve just the right look to match Gregory's vision. At one point he mentioned that the one shot was costing $100K.
How can I as a lone photographer ever hope to match that achieve photos that rival his work on my non-existent budget and crew of one?
Crewdson Doesn't Actually Do Photography
Gregory doesn't actually click the shutter, he has a director of photography who does that for him, because he does not want to be behind the camera. He doesn't do post-processing, he has a team who does that for him. He is basically a producer/director. He has the vision, but he directs his team to make that vision into a final image. My first thought when I realized this was that he is not a photographer, and I was disappointed by that. If I'm going to look up to a photographer shouldn't he be an actual photographer? This bothered me for awhile, but after some reflection I realized he is still a photographer, photography does not have to be about actually clicking the shutter and doing the post-processing, it is more about transferring the vision in your mind onto a photo, the steps in between neither do or don't make you a photographer.
Turning Depression into Inspiration
After a day of processing my thoughts I turned them around and instead of being depressed I became inspired. The documentary shows Gregory at the peak of his career, he didn't start off with huge crews and $100K/photo budgets, he started where I am. Working by himself, making photos out of the scenes in front of him. I can do that, I do, do that, and if I keep at it, perhaps one day I will be shooting at his level. There is nothing stopping me.

Improve Your Photography 30 Minutes at a Time
I often have students at my workshops come up and ask what is the best way to improve their photography. Just being at the workshop is a great step I tell them, but they want to continue to improve after leaving the workshop. My advice to them is to devote 4 weeks a year to photography education.
But I Don't Have the Time
Of course they almost always respond with the fact that they don't have that much time or money to devote to their photography education. So I ask if that could perhaps set aside 30 minutes a day to learn and inevitably they say they could. Well it turns out that thirty minutes a day for a year is equal to 4 weeks of learning.
30 mins/day => 182 hour/year => 22 8-hour days => 4 weeks
It's not the intense training that you would get at a workshop but if you have ever been to a week long intense training class you will realize that it's hard to retain all 5 days of instruction. I feel I have much better retention when learning in 30 minute chunks.
What Should I Study?
I have been following this program of 30 minutes a day of education for the past year. I set aside 30 mins in the evening after dinner every night. Here is some of the material I consume each evening.
- Read a photography book
- Watch an online training course from one of the following
- Lynda.com
- Kelby Training
- Adobe (free training classes)
- CreativeLive
- Phlearn
- Read a photography magazine
As you can see there is a variety of content available. I could easily devote several hours a day to learning and not be able to keep up with all that I want to watch and read, but that is not the point. The point is to improve my photography education and I do every day, 30 mins at a time.
Practice What You Learn
Of course all of the education in the world is useless if you don't pick up your camera and shoot. So schedule some time for shoots. Go on a photo walk, shoot things around your home, don't spend all your time learning, practice what you learn.
Your Action Item: Set aside 30 minutes to improve your photography education and let me know how it works for you. I would also love to hear about what content you use during your 30 minutes.
What Do You Want From Your Photography?
For the past couple of years I've been struggling with my photography and what I want to be when I grow up as a photographer. I've tried a few avenues, made goals to publish a book, be in a gallery, etc. but I've come to realize that these were not really what I was seeking, or if they were it was just a portion of a grander whole. So what do I really want for my photography? I want my photography to be seen. I want people to look at it and have an emotional reaction. I want to be proud of my work. I want people to remember my work and seek out more. I want my photography to be memorable. I want my photos to be loved by others just as much as I love creating them. And really isn't this what most serious photographers are looking for, an AUDIENCE?
Part of what as made this so difficult is I was searching for a single audience for my work. This really came into focus when I took a workshop with John Paul Caponigro in March of 2011 (a life changing event, I've talk about it some here). He stressed that I needed to create cohesive bodies of work, that build on each other. So instead of shooting still life's, Pinup, glamour, landscapes, and everything else I was shooting at the time, I should pick one and make that be my focus. That is where this struggle started, I could not decide which of my bodies of work to pursue, I started thinking of them as which would be more marketable or please more people and ignored my inner passion to shoot all of these things. My creativity seemed to dry up and I felt like I was forcing my photos to fit into some specific unknown project.
It took another workshop, this time by Brooks Jensen publisher of Lenswork Magazine to bring clarity to the path I should be taking. Brooks pointed out that John Paul's model was the correct way to become an artist in the past, but it's not the only way and in fact it a fading view of how to become an artist in today's world. Brooks proposes that you can find an audience for any type of work and that it's OK to have disparate projects and multiple audiences. It may take a bit more work to cultivate multiple audiences, but it is doable. Instead of trying to have a consistency and focus on only one type of photography I feel free to shoot whatever project I want and then find the appropriate audience for that project. This has completely changed the way I now think about my photography and I'm excited now to pursue my passion again.
What do you want from your photography?
This Week in Photo (TWIP) Podcast #312
I was co-host on this week's episode of TWiP with Frederick Van Johnson and Don Komarechka.
Check it out.
http://www.thisweekinphoto.com/2013/twip-312-the-creative-cloud-arrives/
We discussed Adobe's Creative Cloud, Photography Contests, and Photography in a Box.
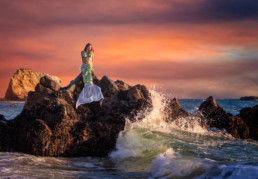
Turning a Crappy Photo Into a Keeper

They Were All Rejects
Trying To Salvage the Shot

The Sky Sucked

The 10 Minute Photoshop Job
- Add clouds. Used Quick Selection Tool to select blue sky, added my cloud image as a layer and made a mask from the selection. A couple of minutes of cleanup on the mask around the wave and rocks.
- Change color of the rocks. Sample reddish color from the clouds, add a solid color layer with the blend mode set to "Color", then with a soft brush set to 10% opacity I paint in the color onto the rocks in the background
- Change cloud color to be more red and increase saturation
- Use Color Effect Pro 4 filter, Tonal Contrast, Skylight filter, and Darken/Lighten Center.
- Back in Lightroom I cropped the image and I was done.

Final Result

How About Your Images?
Create Meaningful Home Videos
Over the past year Documentary Filmmaker David Hoffman has been doing an experiment with his home movies. I watched his first movie about his family's trip to Paris and it inspired me to try the same thing my a family vacation (hope to have the footage posted soon). He recently did another one about his family's trip to New York, I watched one about their search for toilet paper. This is one of eight documenting their New York trip.
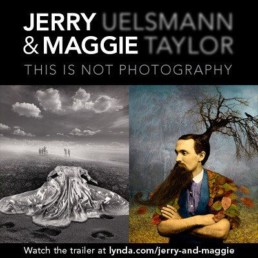
This is Not Photography

This is a recent documentary about Jerry Uelsmann and Maggie Taylor. If you are not familiar with Jerry's work you should visit his web site http://www.uelsmann.net/. He was creating interesting and artistic composites in the darkroom, long before Photoshop came along. His work has always been and inspiration to me and watching this documentary was fascinating. It really got my creative juices flowing and I've already come up with a dozen new photo concepts.
There have been a few public showings of the film, but can also watch it on Lynda.com at
http://www.lynda.com/Photography-tutorials/Jerry-Maggie-photography/90633-2.html
If you aren't already a member of Lynda.com (and you should be), then this is a good excuse to give it a try.
California Photo Festival
Click - The California Photo Festival is an annual event sponsored by Light Photographic Workshops in San Luis Obispo, CA. I was able to attend 4 days of this 6 day event this year. This conference is unlike any others I have attended. Besides classroom workshops, there are a lot of hands-on workshops where the participants get the opportunity to go shoot with the instructors. Almost every day there would be a sunrise shoot, as well as a sunset shoot, with other opportunities through-out the day.
Here is a recap of my 4 days.
Wednesday
Shot with Lee Varis at the San Luis Obispo Mission de Tolosa, where he talked about the zone system.
Attended a talk by Playboy photographer David Mecey, where he discussed the various lighting and posing techniques used in his shots for Playboy
Kevin Ames gave a very technical talk about light meters and how 18% gray is used in today's cameras, and software. I thought I knew this stuff, but was wrong. This deserves it's own blog post.
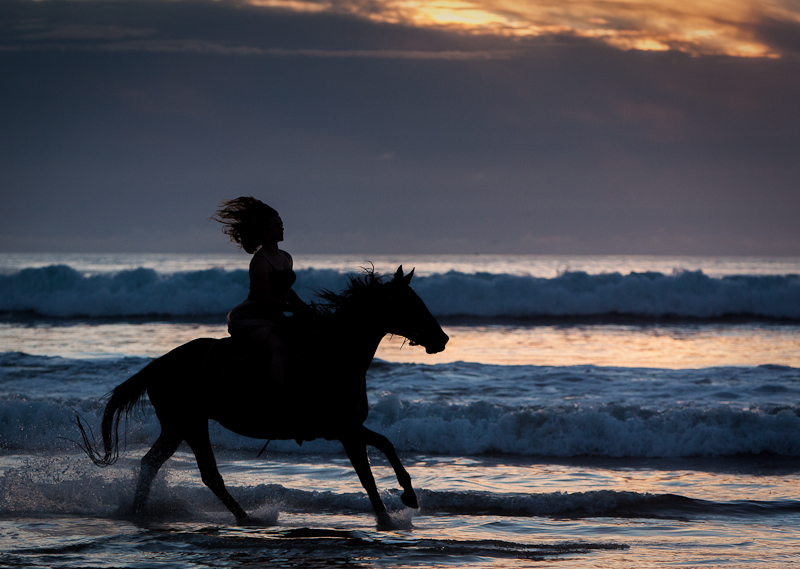
Sunset shoot was Horses on the Beach with Rick Sammon.


Thursday
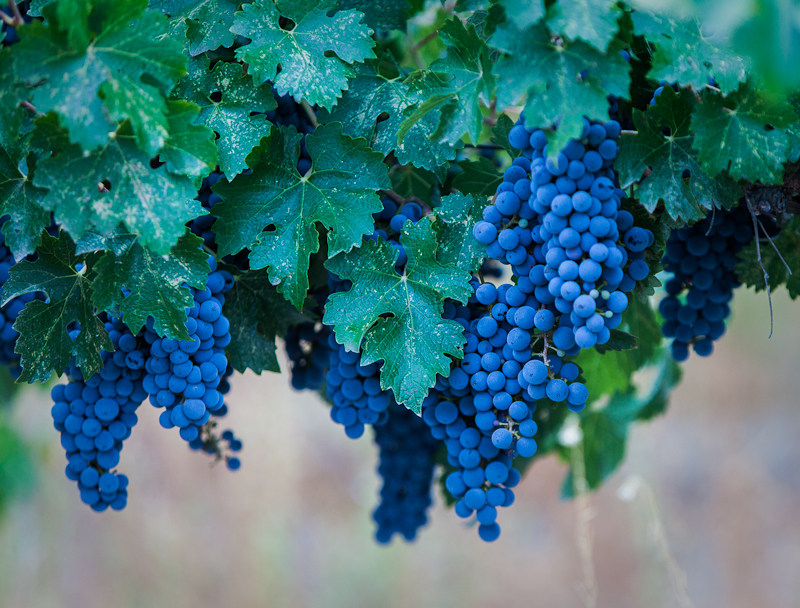
The sunrise shoot was with Lee Varis at a local vineyard. It had rained most of the night and it was still sprinkling when we arrived so we didn't get the gorgeous sunrise we had hoped for, but it was still good to be up and taking photos.
Followed up the shoot with a classroom session with Jane Conner-Ziser about Mastering the Wacom Tablet. Then listened to Rob Sheppard talk about having focus in your photographic work. This is something I've been struggling with for the past year, so it was interesting to get Rob's insight.
I then attended a session with Lee Varis where he demonstrated how to take a classic Hollywood style B/W portrait. This session was much more interesting that I had anticipated and I learned quite a few lighting tricks to get the traditional look.
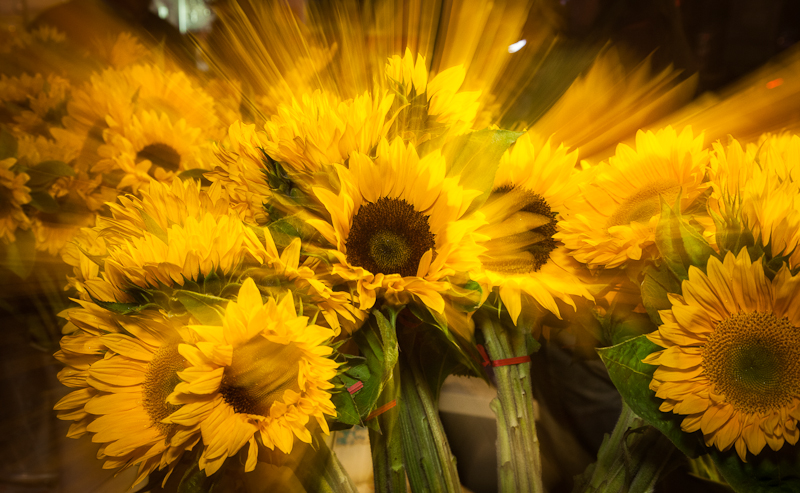
The evening shoot was at the San Luis Obispo Farmer's Market with Bobbi Lane, where we worked on balancing ambient light with flash, and dragging the shutter with camera movement to get some interesting lighting effects.

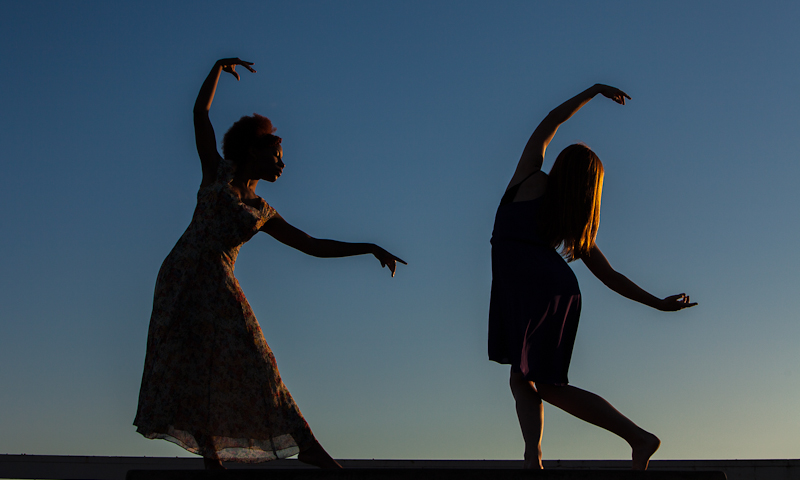
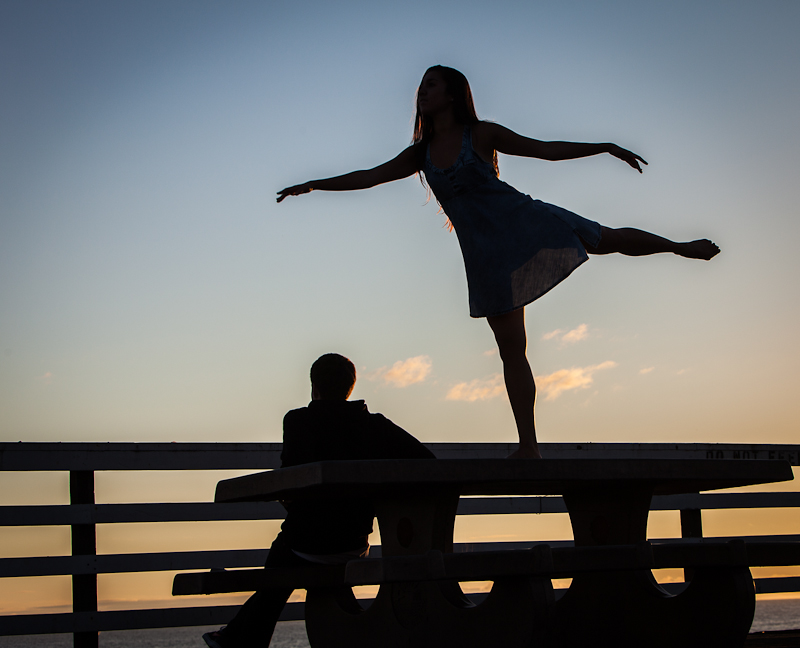
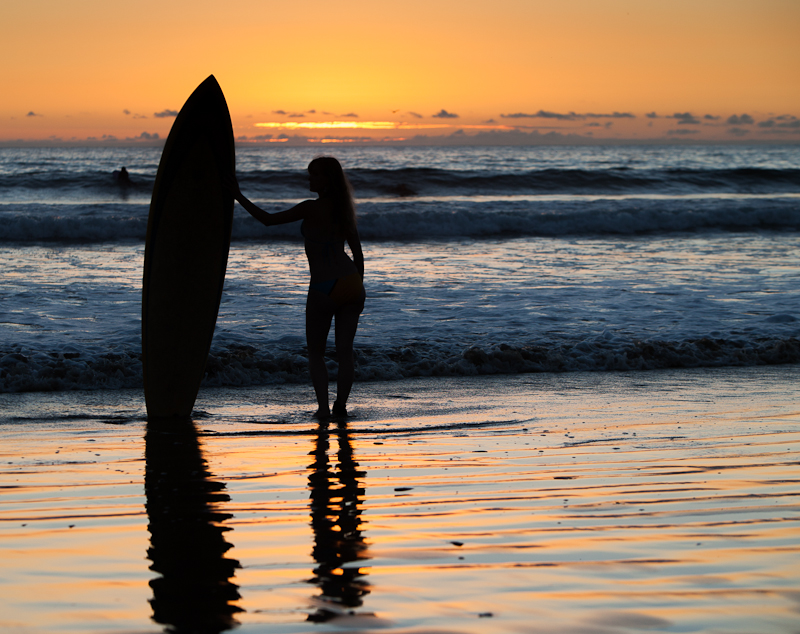
For the sunset shoot we all headed to Pismo Beach where I joined Jane Conner-Ziser's group and shot silhouettes.
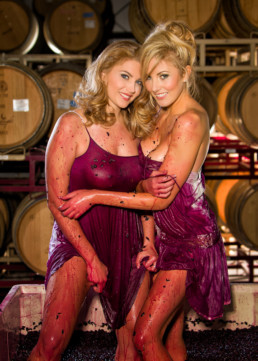
I enjoyed this Festival a lot more than I anticipated. I've gotten to a point in my photographic career where I've been exposed to and tried a large number of the photographic techniques that were taught in the classes and workshops. I now rarely learn anything major at a workshop, instead just picking up little tips and tricks along the way, but it was still beneficial to reiterate some of the things I habve learned in the past but haven't tried in a while. I especially enjoyed the shooting workshops, having the opportunity to shoot horses on the beach, models stomping grapes, and getting up at sunrise to take pictures of a vineyard. Being at an event like this forces me to get out the and shoot which is the whole point to photography.
Behind the Scenes - The Annulment and Love is Blind
Here is a first of many behind the scenes videos. This one is of the shoot that created the images "The Annulment" and "Love is Blind". I didn't have someone to man the video camera so just put it on a tripod and shot wide. Except for the fog creating water spots and haze on the lens it came out OK. Will try to improve in the future.
Ripples
I always have several ongoing photography projects. One of these is taking photos of ripples in nature. I've taken over 1000 images of this type but was never quite sure what to do with them. Individually an image might be OK, but rarely outstanding. I tried displaying them as a single portfolio on my web site but it didn't have the impact that I was looking for.
At Photoshop World this past month I saw a video slideshow by Julieanne Kost that blew me away and I realized that this was the way I should display my ripple photos. So here it is.